Halloween nail with pumpkin ideas have more range than a predictable orange-and-black set. The most engaging versions let the pumpkin become one color note inside a bigger design system: a French curve, a tiny botanical vine, a crisp web, or a playful pink base. That spacing matters because seasonal motifs look sharper when the surrounding nude, white, or sheer areas give every small face and outline somewhere to breathe.
Choose the visual decision that suits your daily routine before choosing the busiest art. Short lengths can carry a pumpkin beautifully when it sits near the tip, while longer shapes can support a web, drip, or illustrated character with more open space around it. If you want a festive manicure that still feels wearable after October, keep one or two nails quiet and use the Halloween detail as a focused interruption, not wall-to-wall decoration.
Red French Curves With Tiny Pumpkins
Red curved tips give this nude almond manicure its strongest movement, and the small orange pumpkins settle naturally into that sweep. A white ghost and fine stars introduce contrast without taking over the surface, so each nail has a separate job. The glossy nude background is essential here because it makes the saturated red and orange feel intentional rather than like a dense cluster of seasonal stickers.
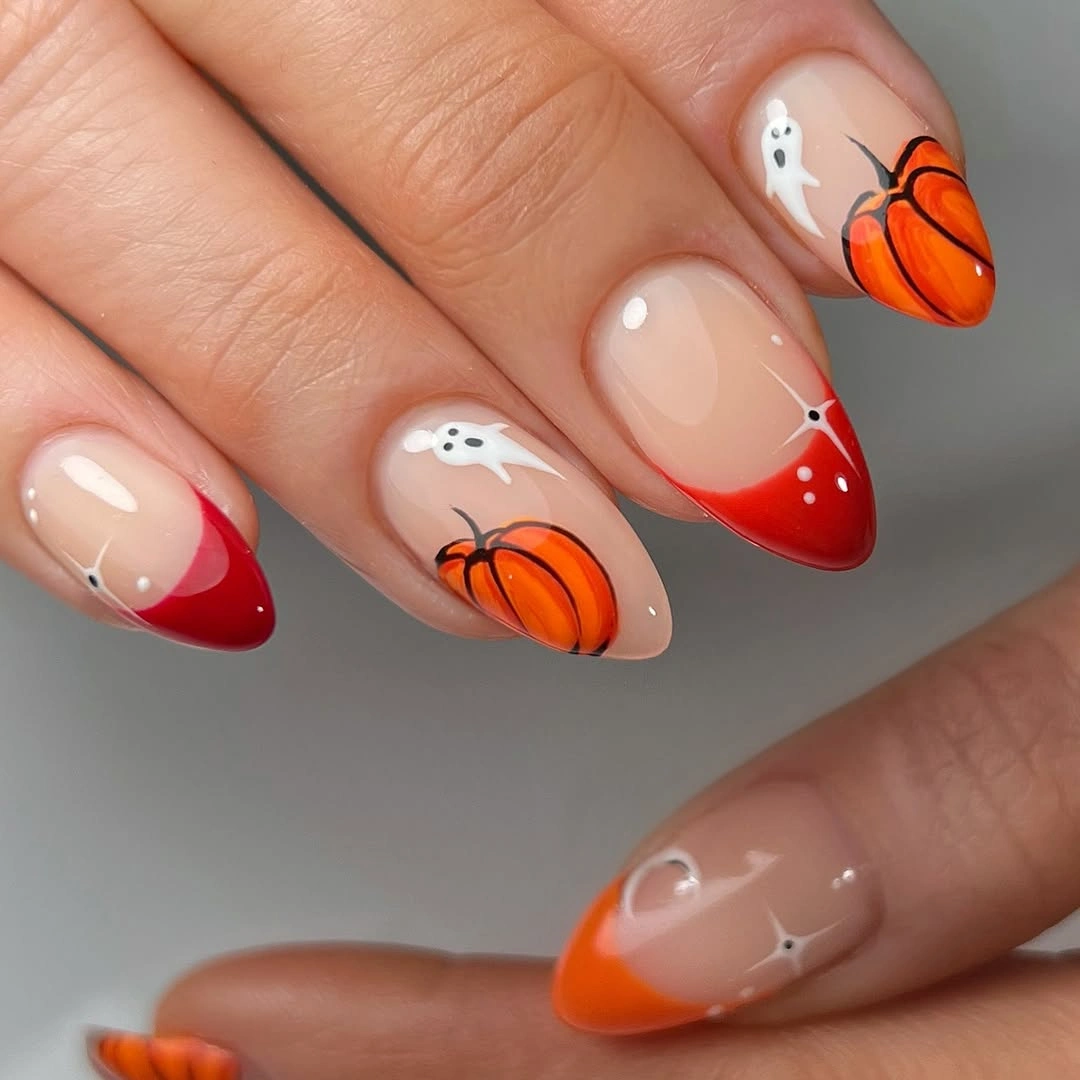
The color story works because the red appears as a broad edge while orange is reserved for the round pumpkin shapes. That difference in scale keeps the motifs easy to spot. If a full red tip feels too strong, shorten the curve and leave more nude visible near the sidewalls. The tiny white ghost can remain as the lightest accent, giving the darker red a clean visual counterweight.
Medium almond length is helpful for this arrangement because it provides a soft point without demanding the maintenance of an extreme shape. Put the detailed pumpkin on alternating fingers and let the other nails carry only color or a star. That edit makes the look less fussy as it grows out. It also keeps the design readable when hands are moving rather than held still.
Purple Webs Around White Ghosts
Lavender-purple web lines shift this ghost manicure away from a standard black Halloween palette. The long square shape offers a generous flat canvas, allowing a tall white ghost, small stars, and a web to sit on different nails without crowding one another. The nude base stays visible between the drawings, which gives the color a lighter, more playful feeling than a fully dark set would create.
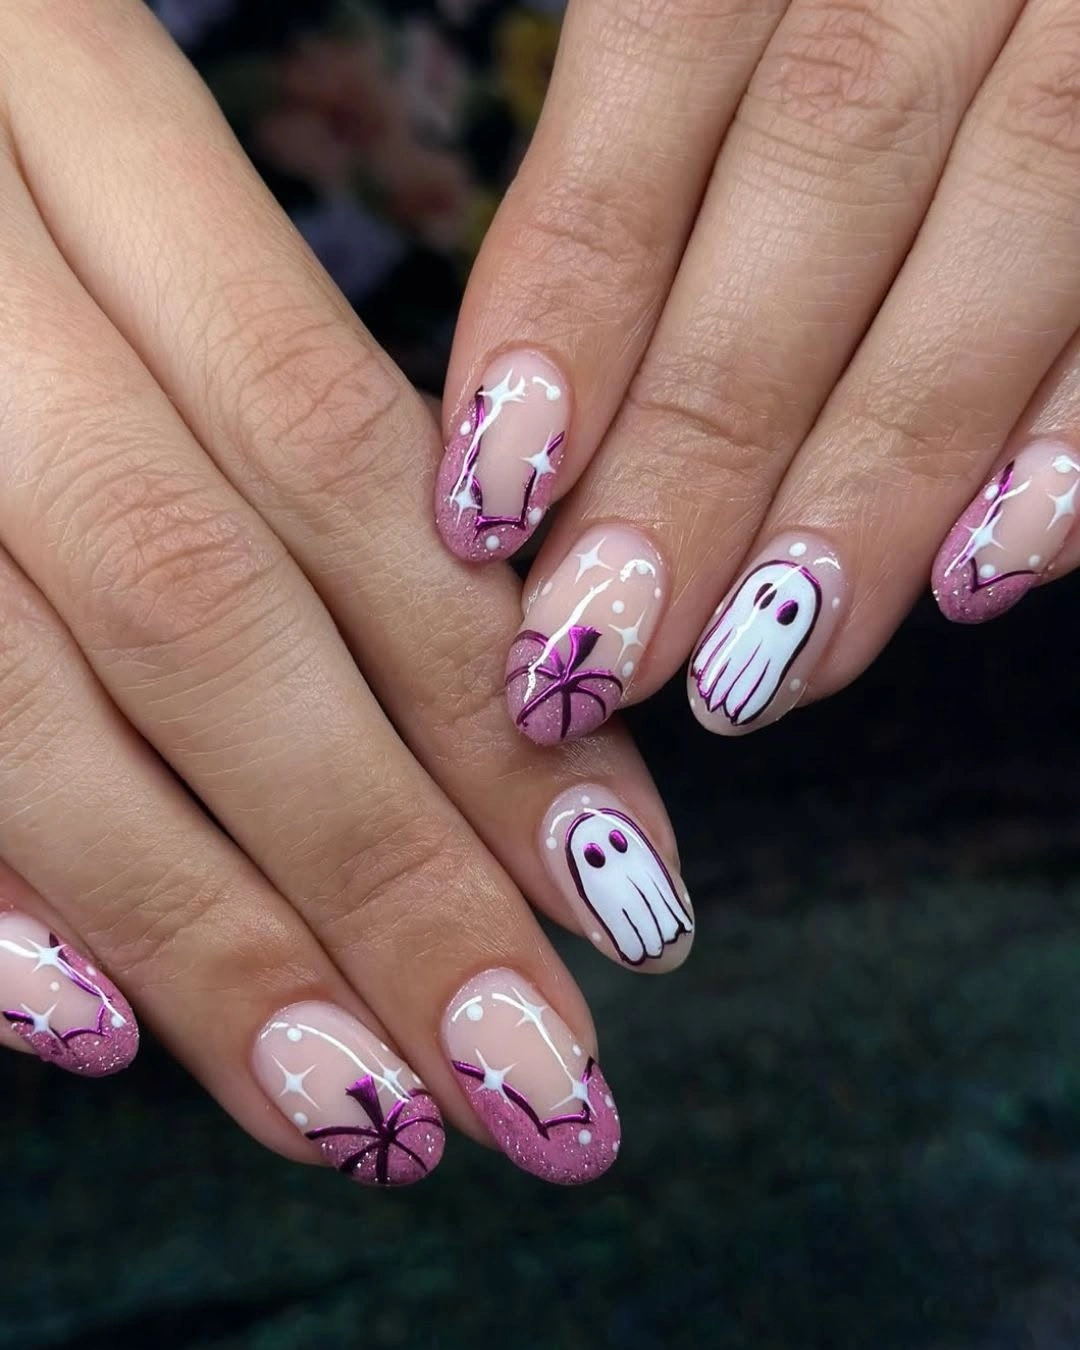
Use purple as the outline color when you want spooky motifs to feel softer and more personal. It has enough contrast against nude to define the web, yet it does not dominate the way black can on every finger. One illustrated ghost per hand is plenty. Let the remaining nails repeat only a small star or partial web so the artwork maintains a clear hierarchy.
Long square nails make detailed line work visible, but the free edge can be more noticeable in everyday wear. A shorter square version could keep the same design by moving the web into one corner and reducing the ghost to a simple white shape. The color relationship will still hold. That is the part worth preserving, rather than every tiny line of the original illustration.
Black Cats and High-Contrast Icon Mix
Black cats, a pumpkin face, a white ghost, and a web all appear across this pointed manicure, yet the set avoids visual confusion by alternating black and white bases. The darkest nails carry the lightest drawings, while the pale nails hold the black cat silhouettes and orange accent. That reversal gives every icon a clear boundary and makes the many Halloween references feel organized instead of scattered.
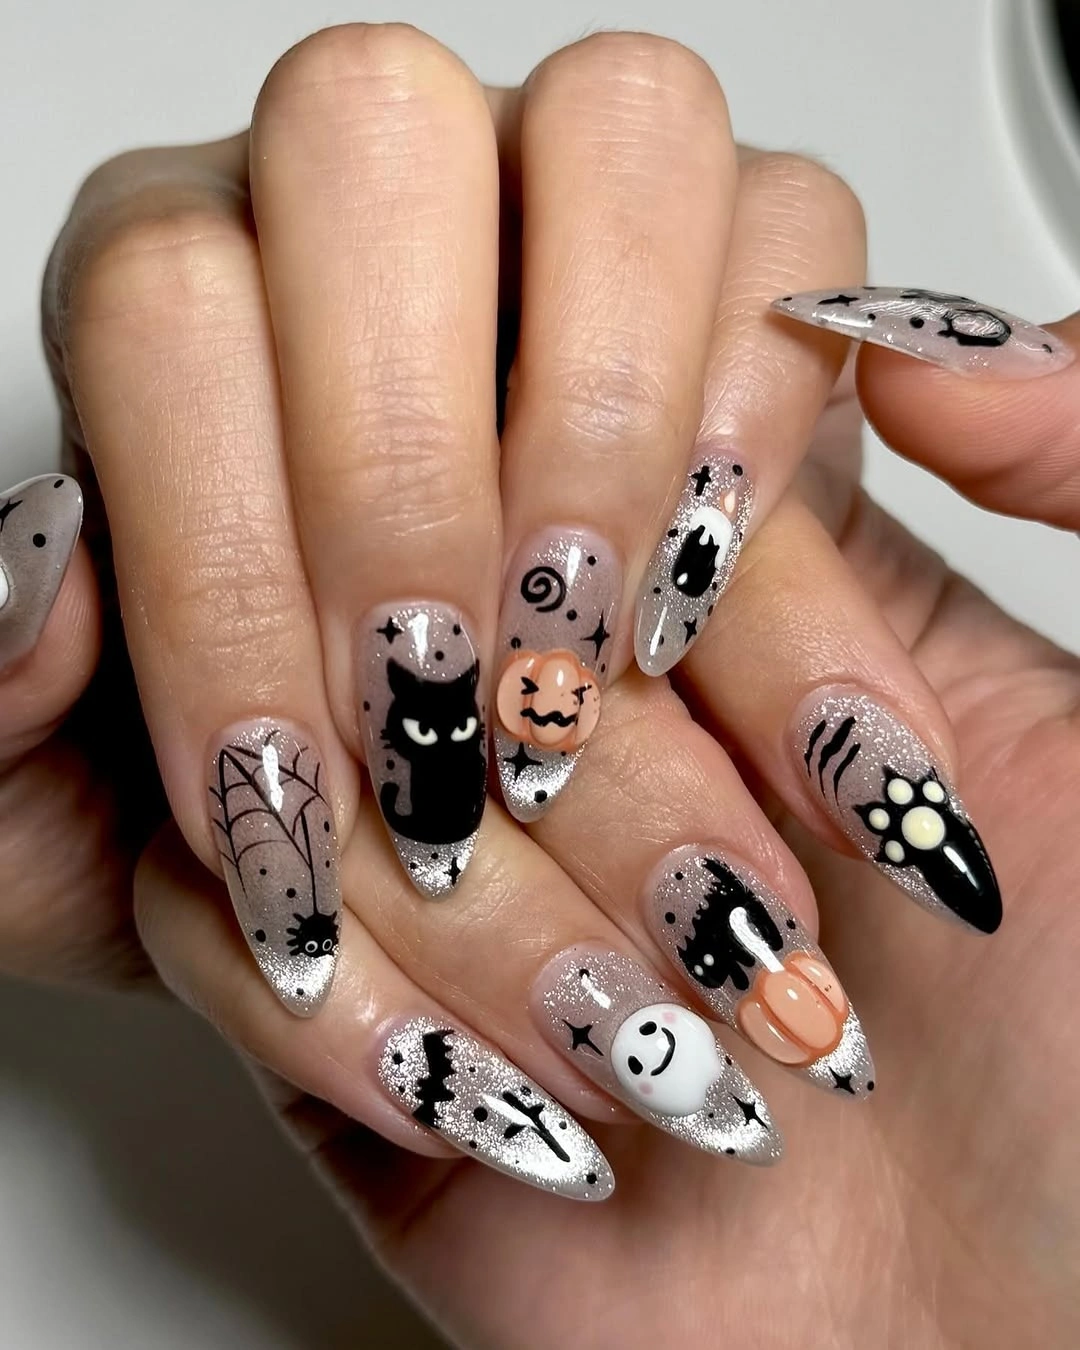
A mixed-motif design needs a simple rule before it needs more art. Here, contrast is that rule: light motifs live on black, dark motifs live on white, and orange arrives only as the pumpkin color. For pumpkin nail art Halloween easy adaptations, choose three icons rather than four and repeat them once. The nail-to-nail variation will still feel lively without requiring a miniature scene everywhere.
The pointed length helps these graphic shapes look deliberate, especially where the black color extends toward the tip. On a shorter almond shape, keep the cat face and pumpkin as the main motifs, then replace detailed webbing with a single curved line. That reduction improves legibility at close range and lowers the chance that every nail begins to compete for attention.
Clear Space With Black Web Tips
Sheer nude space is the main attraction in this long square look, with black spiderweb arcs gathered near the tips instead of spread across the whole nail. One darker red-and-black focal nail adds weight, while the remaining fingers stay almost transparent. The result feels graphic because the web is treated as an edge treatment, leaving the central nail plate open and clean.
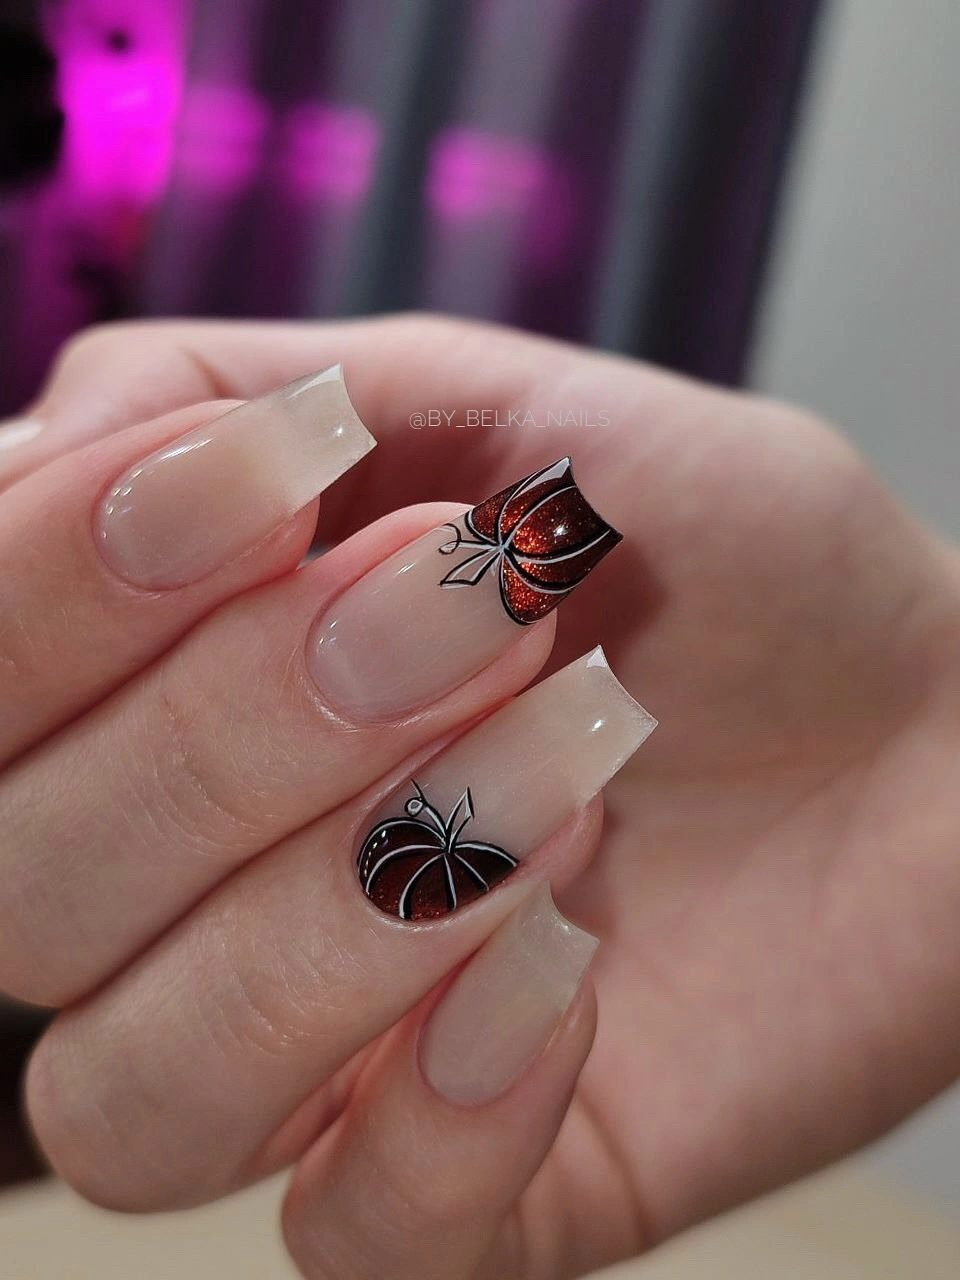
Web art becomes much easier to wear when it behaves like a French tip. The line work can follow the free edge, then taper before it reaches the center, which avoids a heavy all-over effect. Keep the black details fine and let only one nail carry the deeper accent. That spacing makes the manicure feel sharper than a version where every finger is filled with the same web.
The clear base also makes grow-out less obvious than a solid dark color, which is practical for a longer length. The tradeoff is that any unevenness in the line work becomes more visible, so the web needs a steady, simple pattern. If you prefer less maintenance, use the same concept on medium square nails with a single web corner and a small black tip.
Quiet Gold Lines on Short Nude Nails
Short rounded nails prove that Halloween can stay light and restrained. A nude base carries delicate gold lines, a small white shape, and subtle green botanical details, with plenty of untouched surface around them. The manicure reads more like a seasonal accent than a costume accessory because the colors are quiet and the motifs are scaled carefully to the compact nail length.
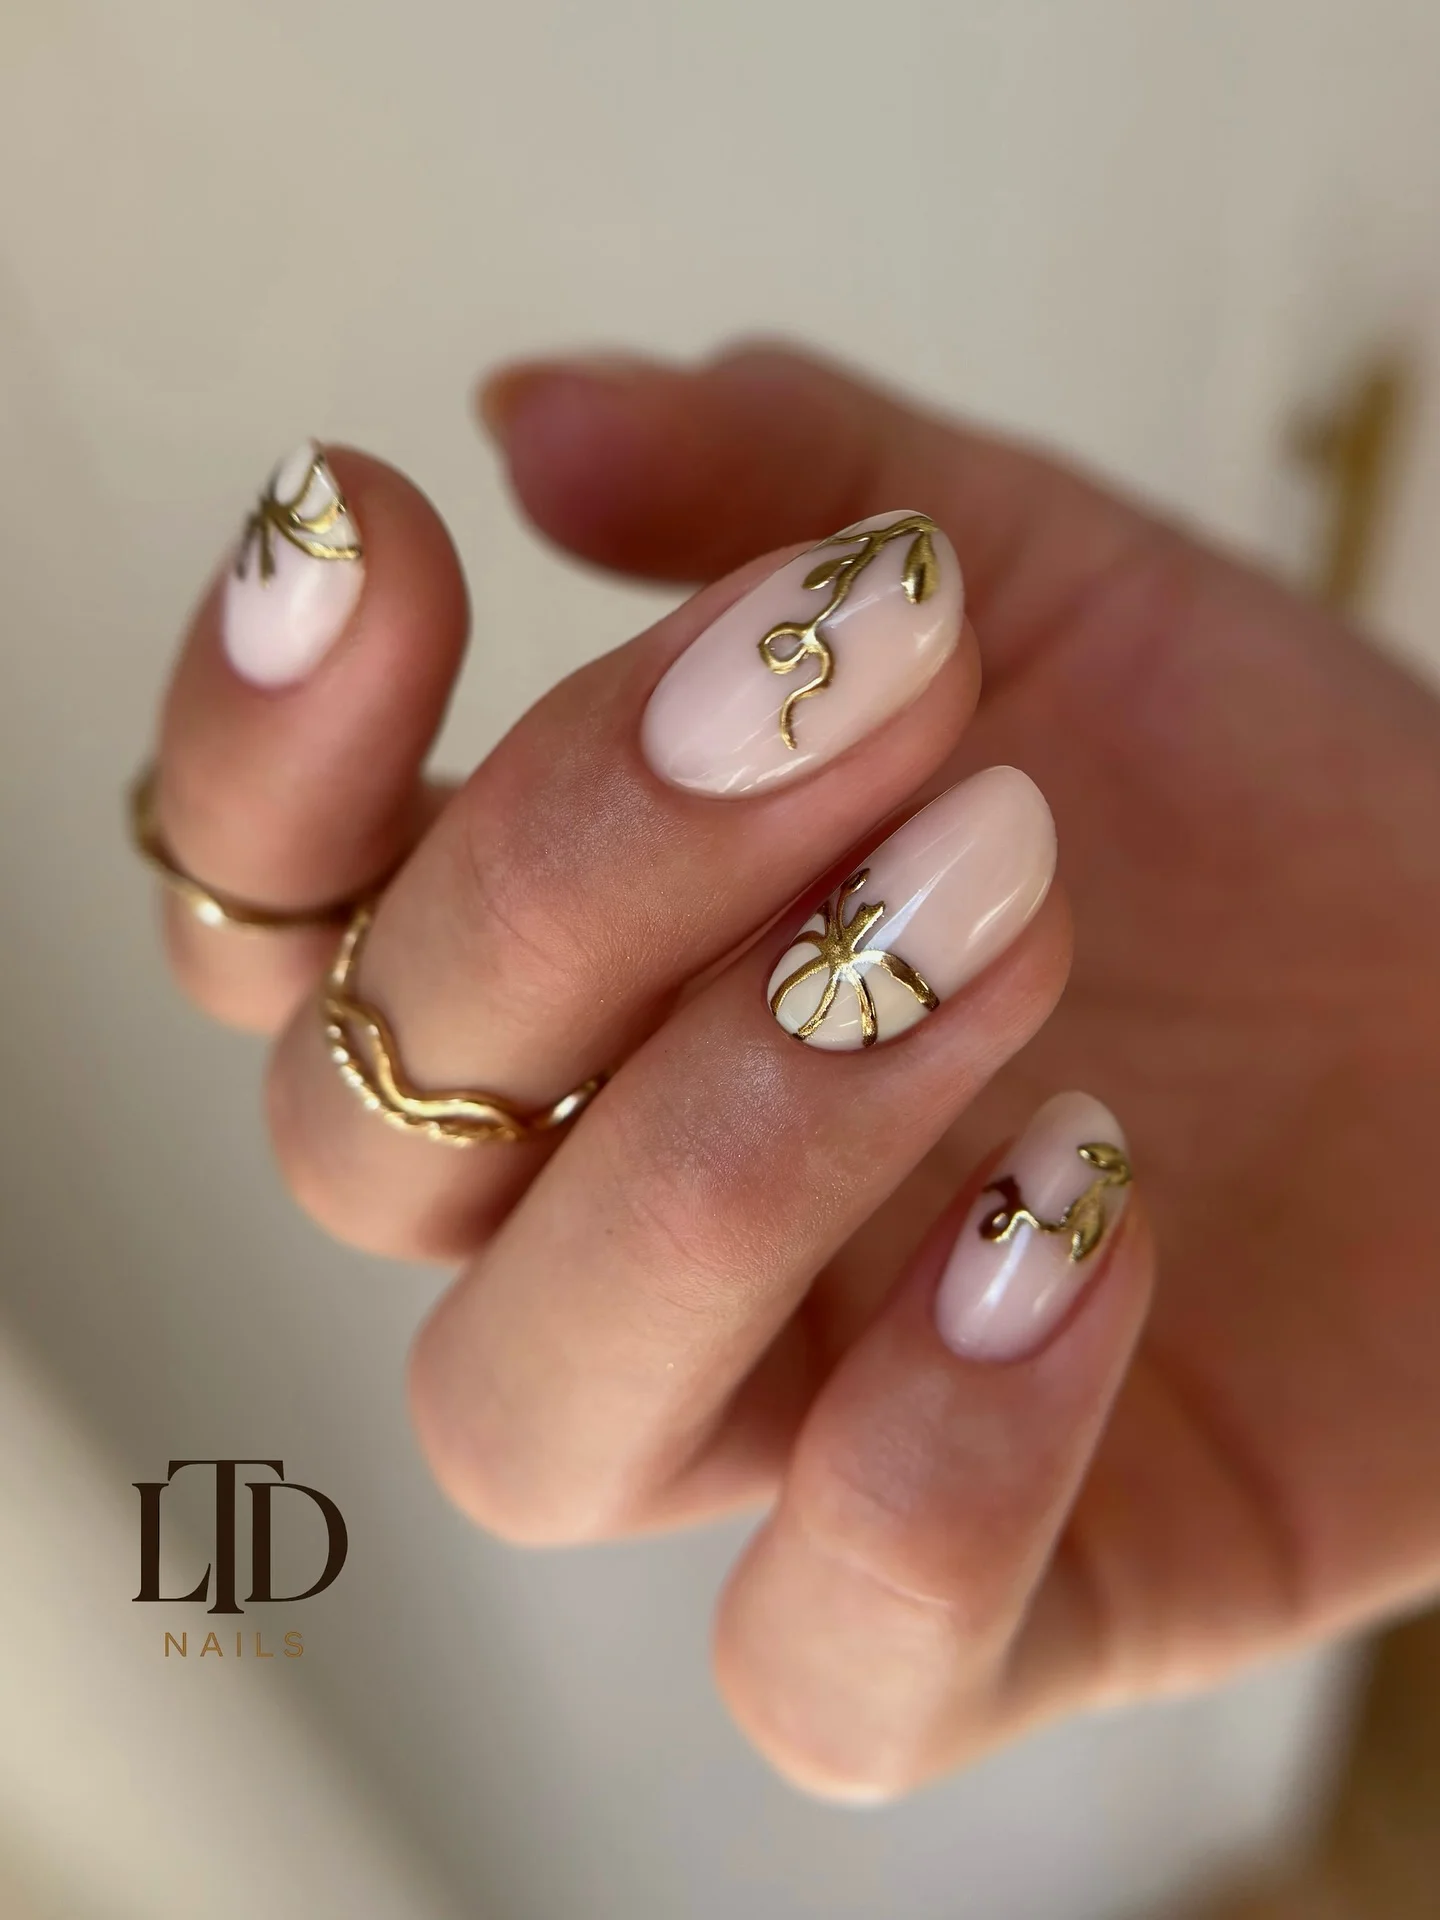
On short nails, empty space is not a missing element – it is what makes a tiny drawing visible. Keep the metallic-style line work near the outer edge and give each finger only one small detail. A gold curve can provide enough seasonal warmth without an orange pumpkin on every nail. That is a useful option if you want the Halloween reference to stay subtle at work or school.
Because the design is small, the best upkeep choice is to avoid dense art near the cuticle. Leaving the base clear lets the manicure age more gracefully and keeps the delicate details from looking compressed. Those who enjoy short nail ideas can borrow the same sparse layout with a small black spider or a single orange dot, but the nude-and-gold balance should remain the priority.
Black Cat Faces on Milky Almond Nails
Milky white almond nails make the black cat faces feel centered and crisp, while a small orange pumpkin adds a warm break in the repeating pattern. The motifs are simple enough to read quickly: rounded black ears, bright eyes, and one compact orange shape. That directness gives the manicure a cheerful Halloween mood without requiring a busy background or a different design on every finger.
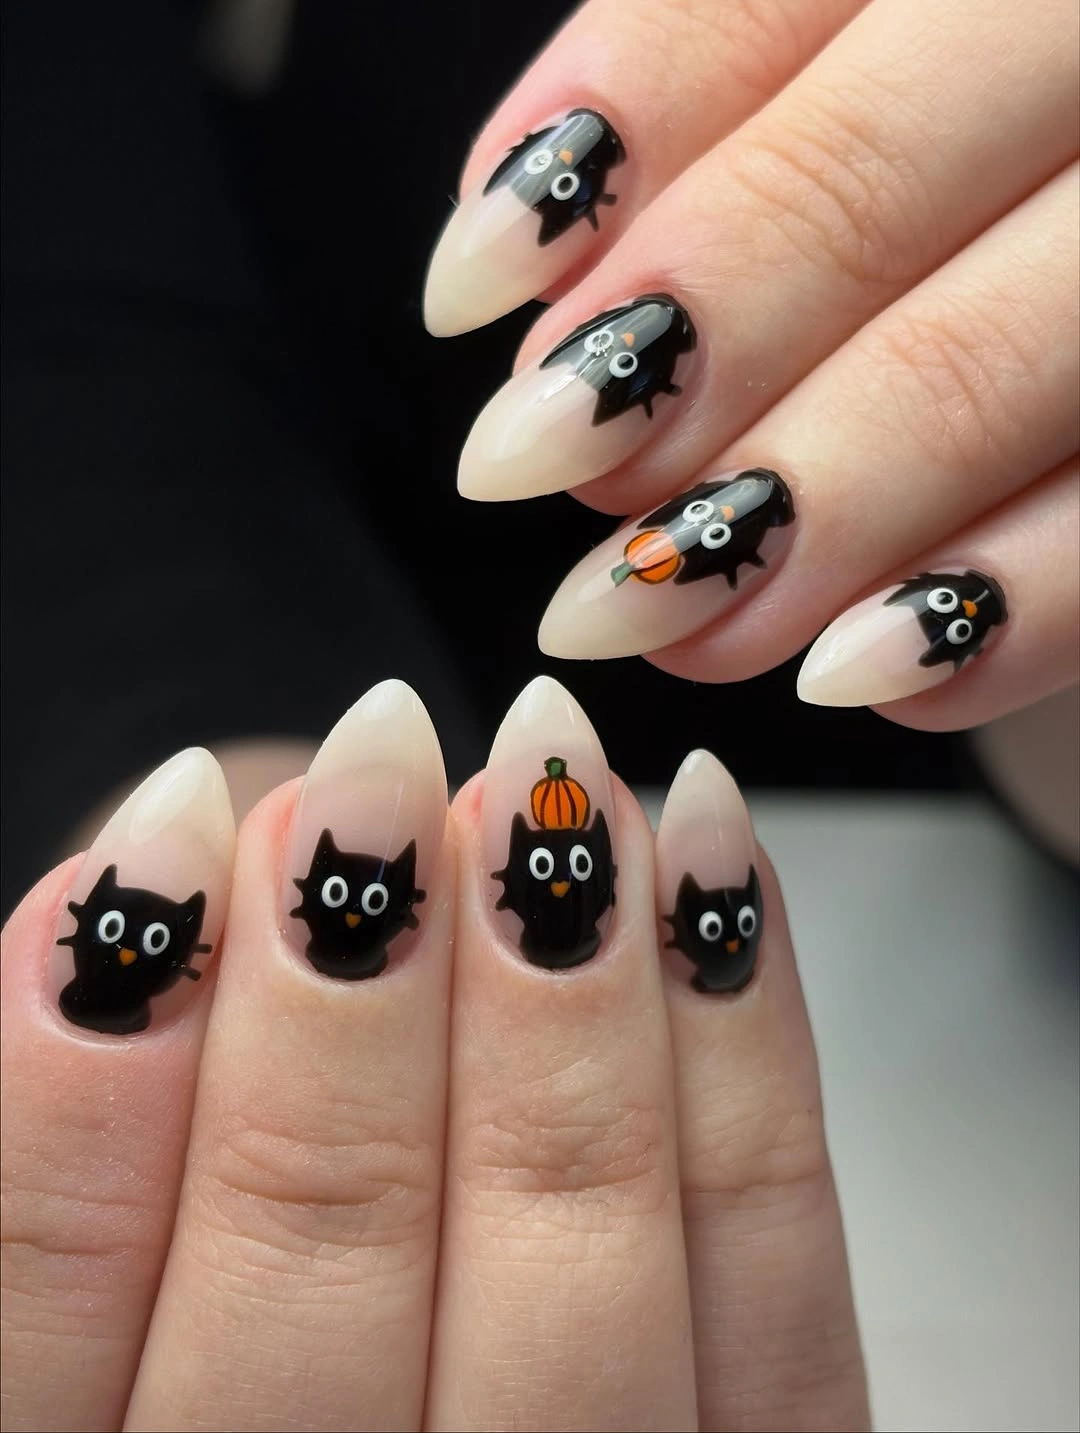
Repetition is doing the visual work here. When the same cat face appears across several nails, the eye understands the theme immediately, and the pumpkin feels like a deliberate exception rather than an extra ornament. Keep the faces centered on the milky base and avoid adding too many outlines around them. The contrast is already strong enough to make the small details pop from a normal viewing distance.
A medium almond shape is forgiving for this style because the rounded tip echoes the cat face without making it look stretched. If you want a simpler pumpkin nail design, leave two nails plain milky white and place the orange accent on only one finger per hand. The result remains festive, but the reduced density gives the artwork more room and makes routine touch-ups less demanding.
Vertical Gold Frames Around Orange Pumpkins
Thin warm stripes run vertically beside orange pumpkin illustrations on these long nude nails, creating a tailored frame around the seasonal art. The color placement is controlled: orange appears in the rounded pumpkin forms, gold-like lines add length, and the nude field prevents the whole set from becoming too warm. The result is more polished than a full orange manicure because every color has a different structural role.
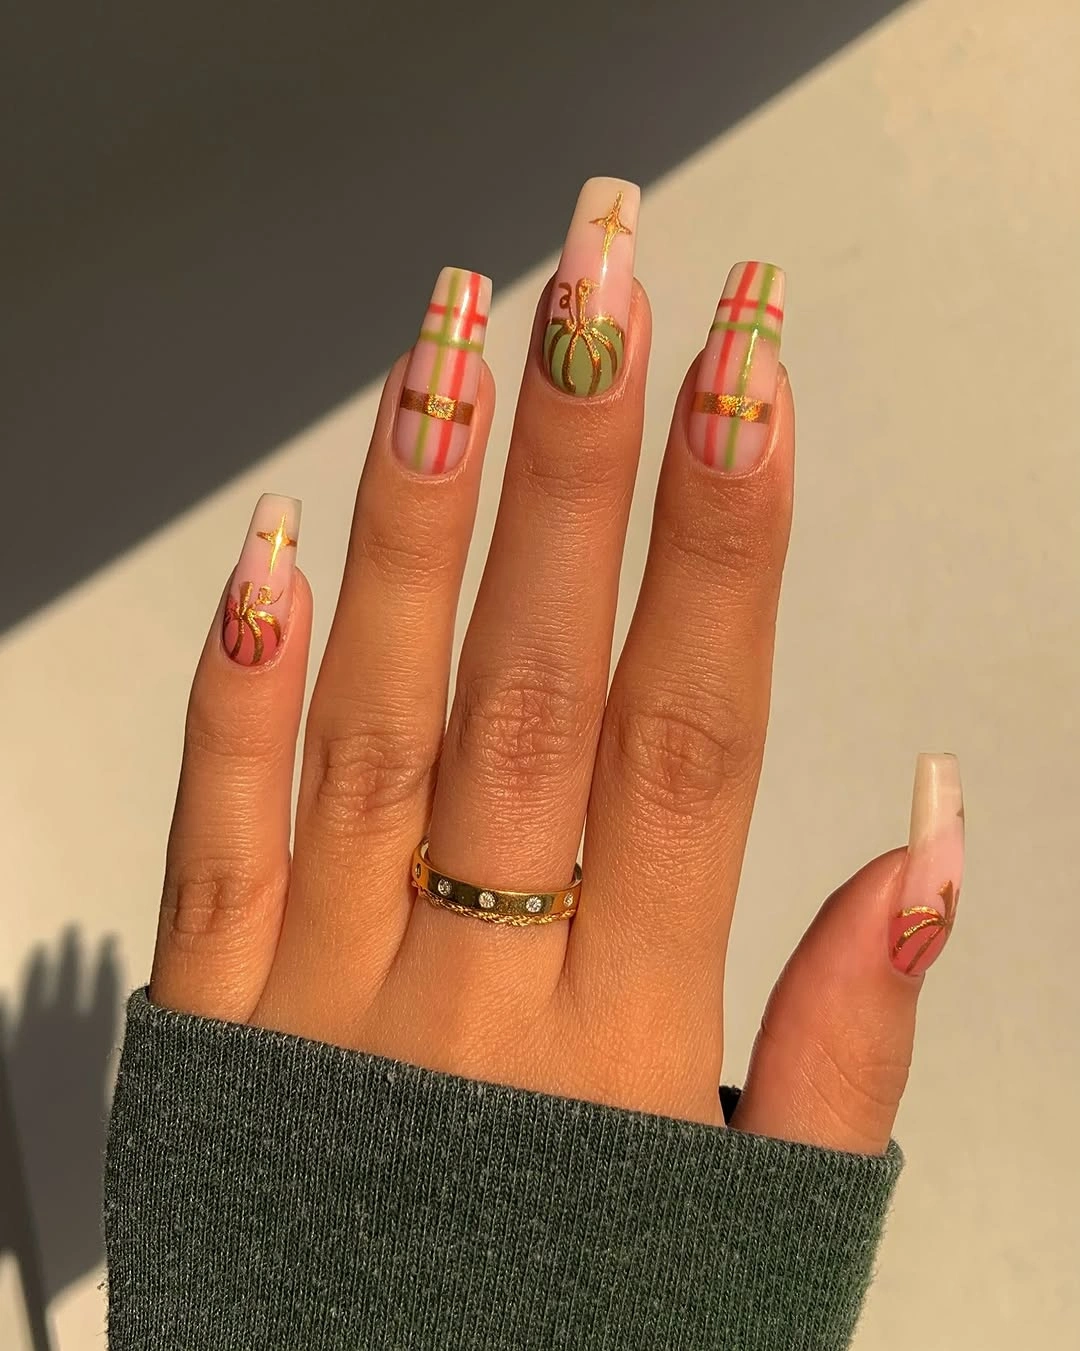
Vertical detail is especially effective on longer shapes because it draws the eye toward the tip and makes the nail look even more elongated. Use the pumpkin on one or two fingers, then repeat only the stripe on the others. That approach keeps the theme present without forcing a miniature illustration across every surface. A red micro-accent can work here, but it should remain smaller than the orange forms.
There is a balance to protect with line work: too many parallel stripes can make the design feel rigid. Let one side of the nail stay open and place the pumpkin slightly off center so the layout has movement. A medium length could use a single stripe instead of two. The warm nude base is what makes the concept adaptable across sizes and everyday outfits.
Mini Pumpkins Along a Colorful Short Tip
Small pumpkins, bright faces, and colorful tip accents turn these short rounded nails into a lively little Halloween color moment. Blue, pink, green, and orange appear in compact touches along the free edge, while the nude center stays clear. That division is important on a short length: the playful colors sit at the border, so the manicure still has breathing room and does not look visually heavy.
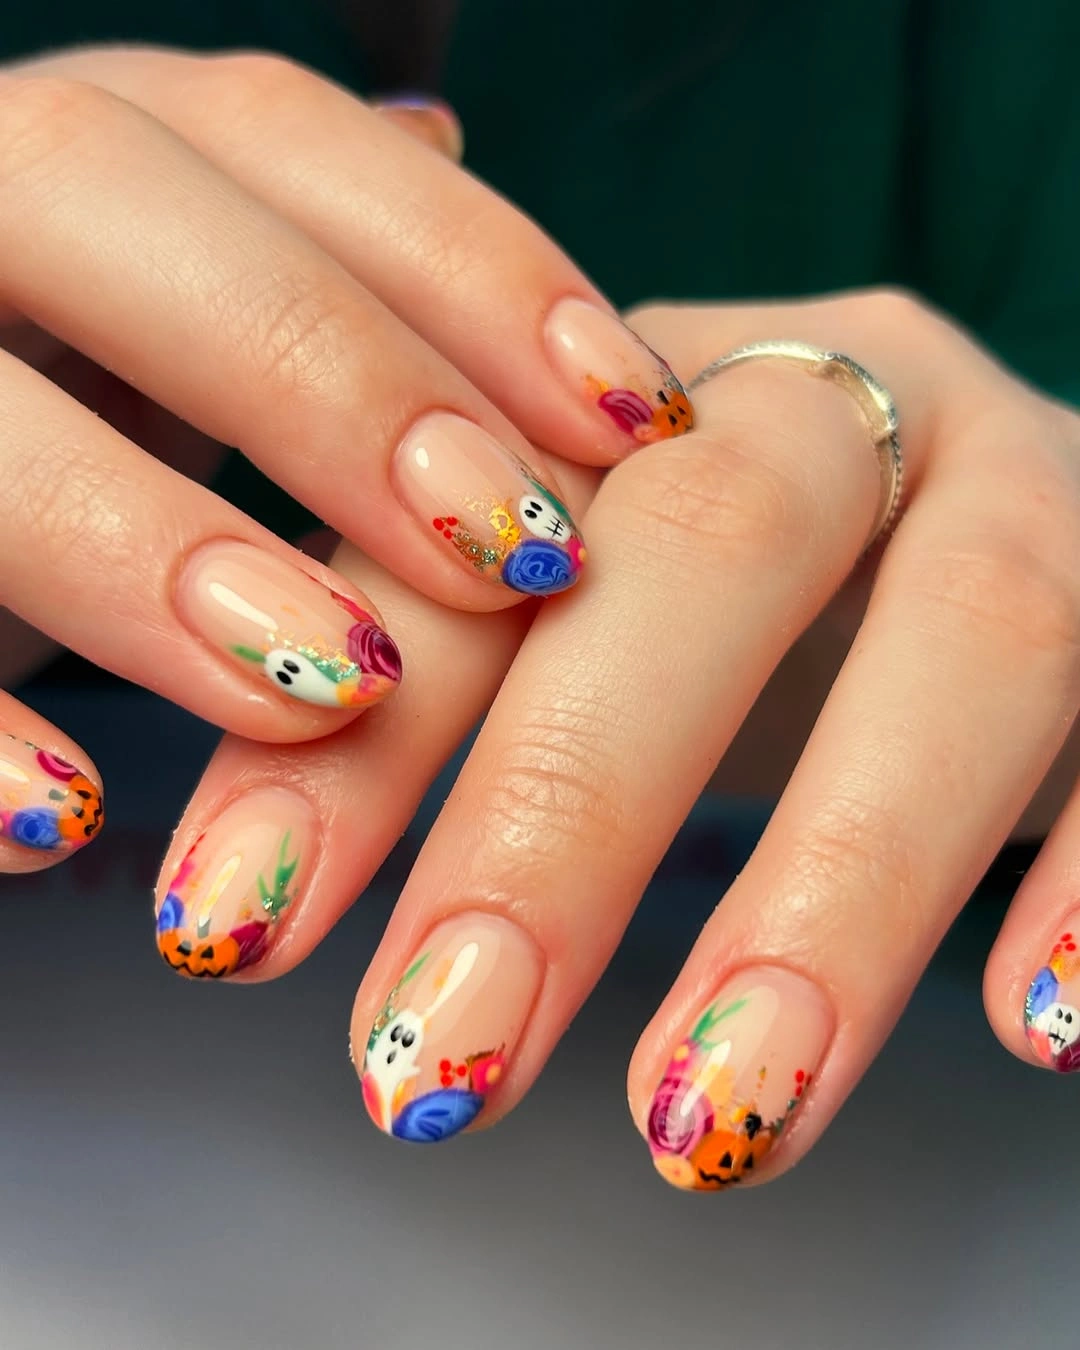
For short nails, follow the edge rather than covering the center with tiny figures. A miniature pumpkin or face can sit inside a colored tip, which makes the detail feel anchored instead of floating. The palette looks most coherent when one or two colors repeat across both hands. You do not need every bright shade on every finger for the cheerful effect to come through.
The fun option has a practical limit: small art can lose clarity if too many shapes are squeezed into one tip. Leave at least one nail with only a colored curve, then use the detailed pumpkin on a neighboring finger. That spacing keeps the composition legible as the nails grow. It also gives you an easy way to shorten the design without losing its festive energy.
Blue Tips With Tiny Halloween Faces
Bright blue tips give this compact nude manicure a cool contrast to the orange pumpkins and small pink-green details. The playful faces stay near the free edge, making the design feel like a miniature border rather than a full illustrated scene. Because the base remains neutral, the different colors can coexist without turning the short nails into a crowded patchwork of unrelated motifs.
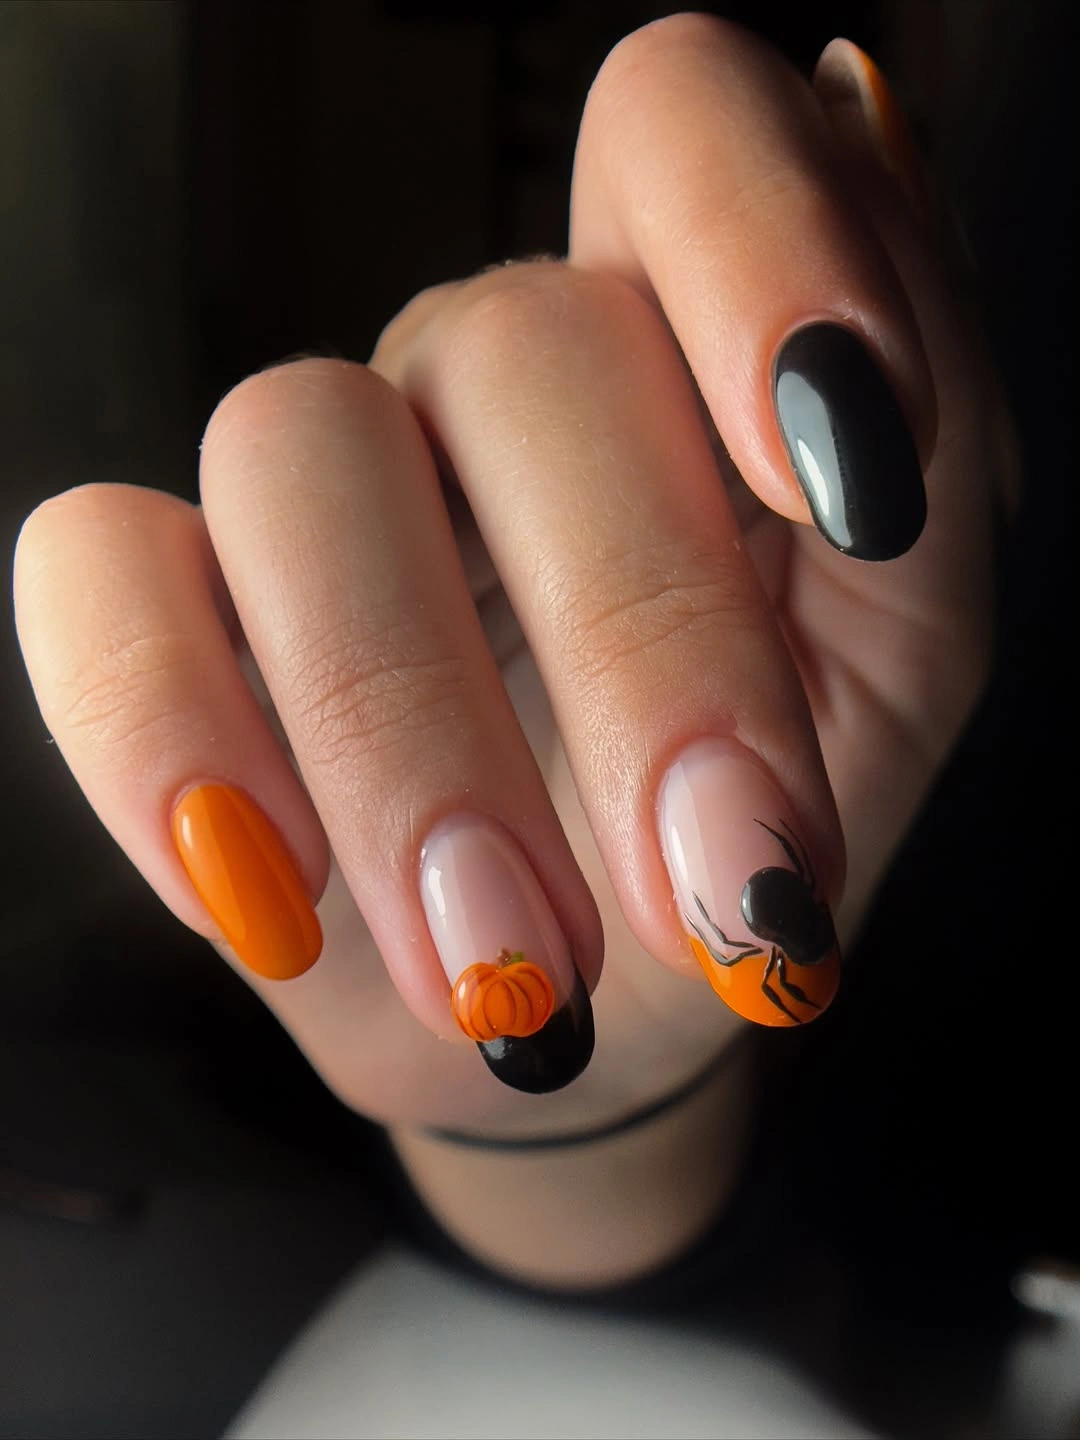
Blue is useful here because it separates the pumpkin orange from the warm nude base. Treat it as the strongest tip color, then use pink or green only in tiny supporting marks. The result feels more deliberate than an evenly mixed rainbow of shades. If you want a less colorful version, keep the blue edge and replace the other accent colors with white, letting the pumpkins carry the warm seasonal note.
Short rounded shapes are ideal for an edge-led layout, but the motifs need to remain broad enough to be recognizable. Avoid shrinking a whole ghost or web down to a few unclear lines. A simple pumpkin circle, eye pair, or dot cluster reads better at this scale. The manicure will look cleaner in daily life, especially when the nails are not viewed under close-up lighting.
Graphic Black and Orange Curves
Bold black and orange curves sweep across these medium almond nails, creating a graphic background for the smaller pumpkin faces. The color blocks are asymmetrical, with some nails carrying a deep black section and others a bright orange one, so the set has movement even before the illustrated details are noticed. Nude remains visible between those arcs, keeping the seasonal palette from becoming too dense or flat.
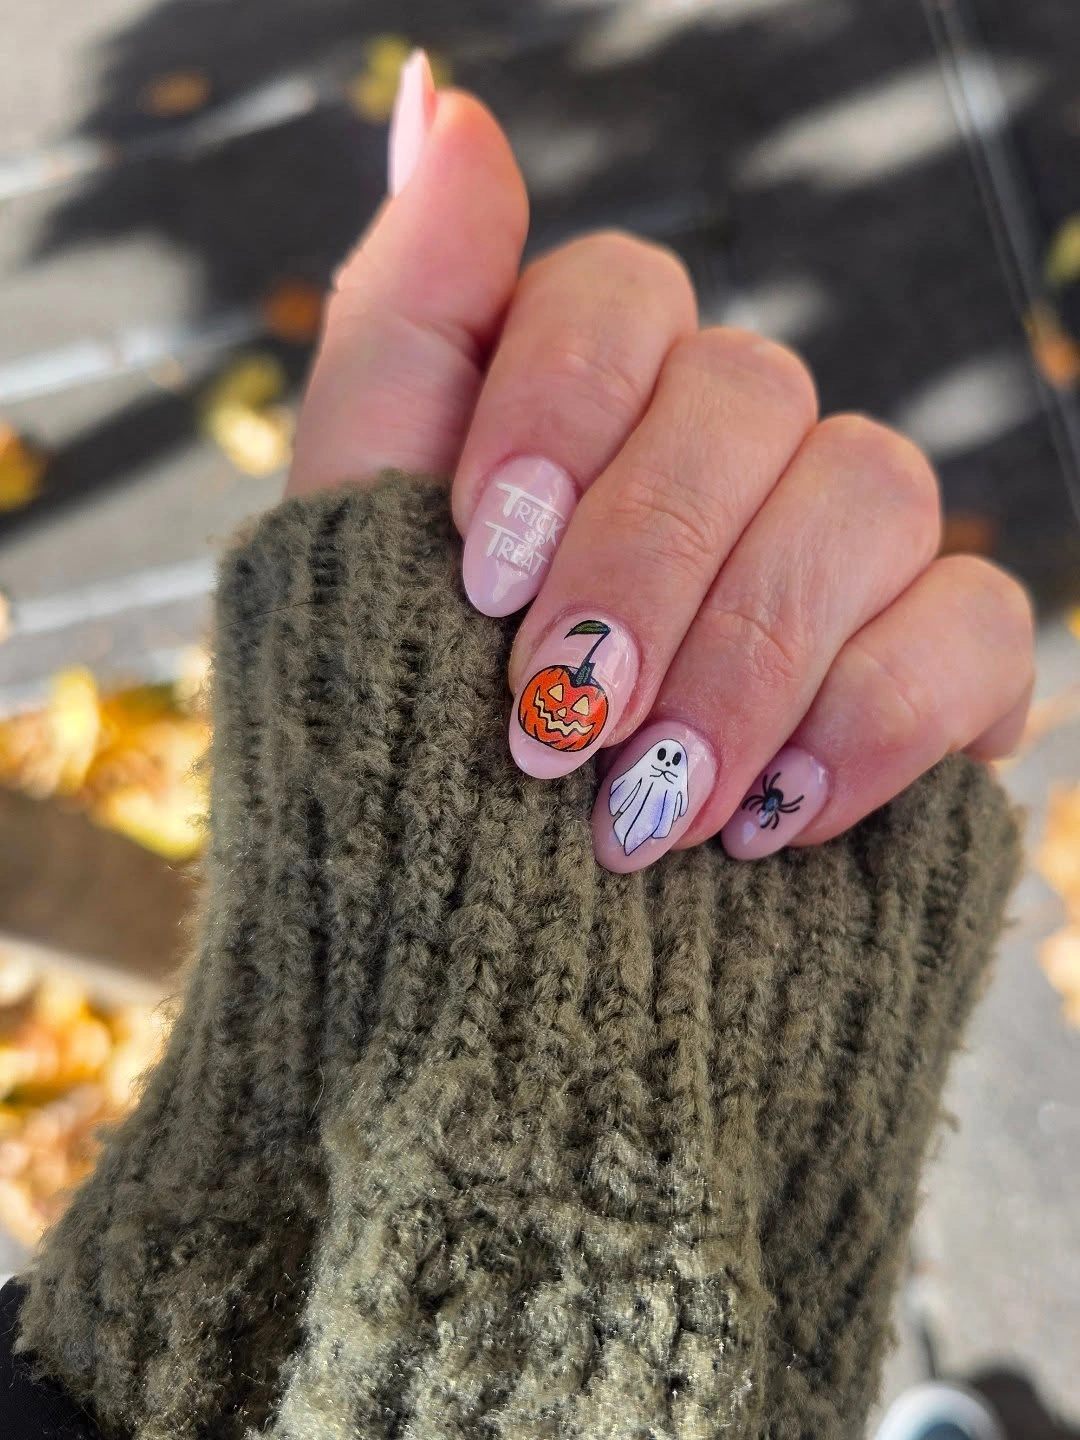
Start with the large curves when recreating a graphic Halloween look like this. They establish the rhythm and give the pumpkin a place to sit, whereas a pumpkin placed alone on nude can look isolated. Limit the face art to a few nails and let the rest rely on black-and-orange geometry. That contrast between broad color and tiny detail is what makes the composition feel punchy rather than busy.
Medium almond length gives the curves a smooth direction, but the design can be translated to a shorter oval by using one diagonal split per nail. The tradeoff is that very dark sections may show wear near the tip sooner than a sheer base. Keeping some nude visible helps soften that issue. It also gives the manicure a lighter finish for anyone who does not want full black nails.
Gray Webs With Ghost and Pumpkin Mix
Cool gray web work brings calm structure to this icon-rich manicure, which includes ghosts, pumpkins, orange drips, and small dark outlines. The medium square shape gives the drawings a stable surface, while the gray base prevents the black-and-white details from feeling overly severe. Each nail carries a distinct seasonal reference, but the muted ground keeps the collection of motifs visually connected.
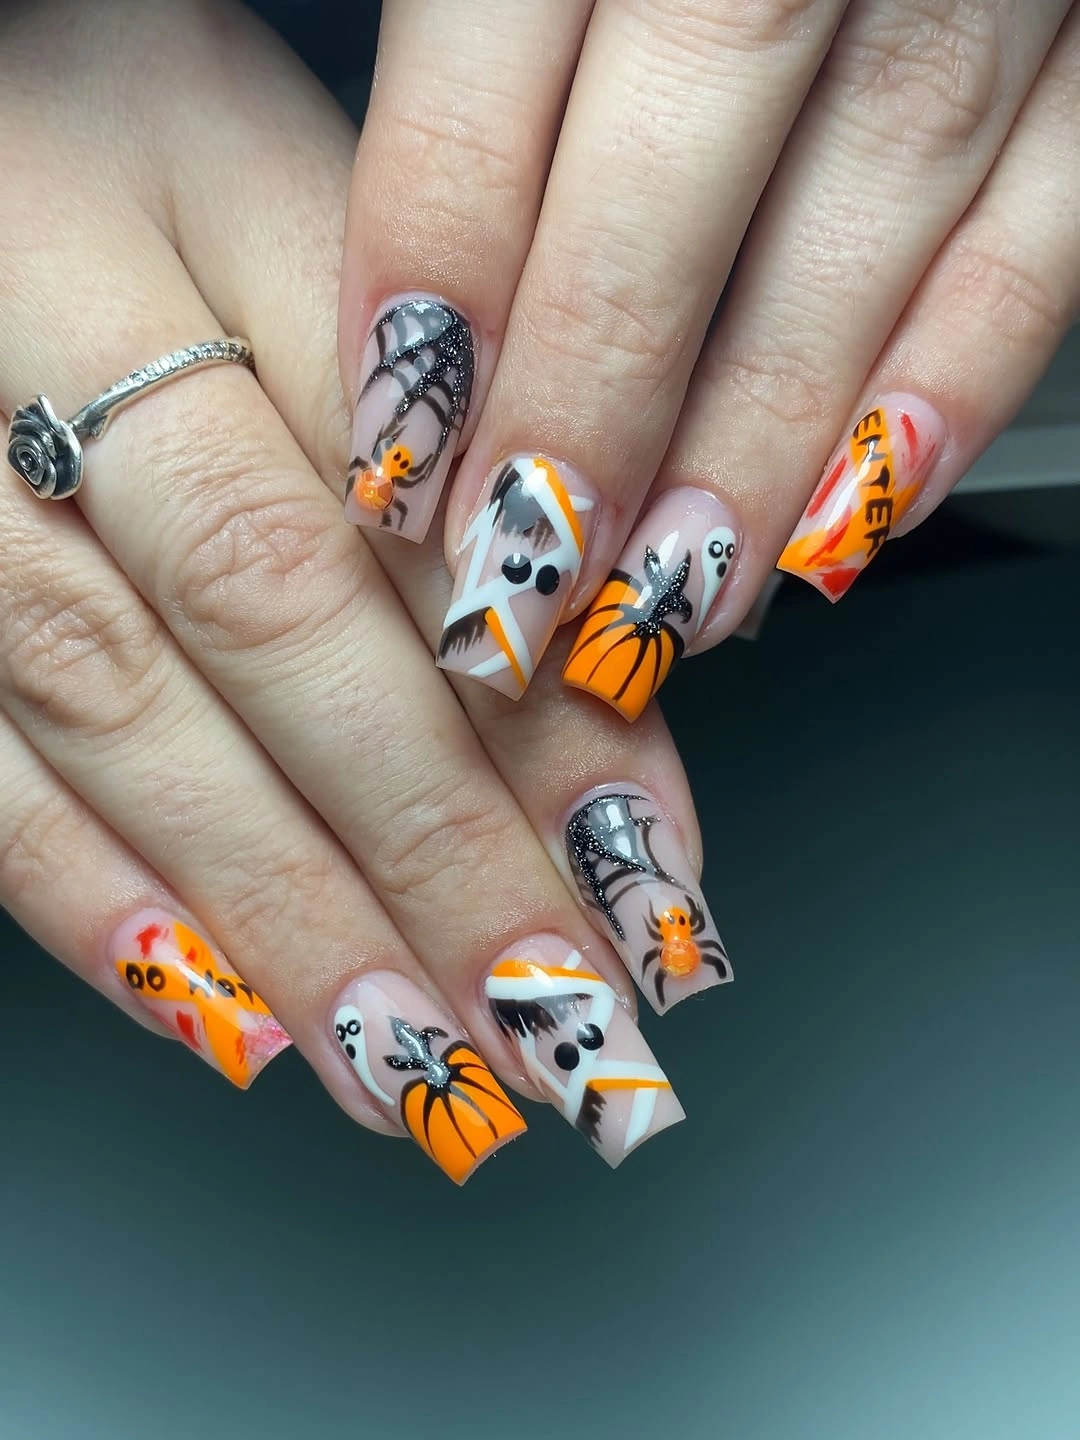
Gray is a smart middle ground when you want several Halloween icons but do not want a fully black design. It supports white ghosts and orange pumpkins equally well, allowing the darker outlines to appear only where they define a shape. Keep one nail mostly webbed, another mostly ghost-led, and another pumpkin-led. That division makes the mix easier to read and avoids repeating the same miniature scene.
Square nails make the art look graphic, although the corners may call attention to chips during everyday wear. A shorter square version would work best with fewer icons and one large web corner. The gray base can remain because it is doing the important job of tying the colors together. Simplifying the illustrations is more effective than trying to reduce every motif to a tiny, unclear version.
Tattoo-Like Symbols on Nude Almond Nails
Black-outlined symbols give these long nude almond nails a tattoo-like Halloween feel, with a spider, potion bottle, cat eye, lips, and small motifs placed separately across the set. Color appears in compact bursts of pink, green, and red, while the nude base keeps each drawing isolated. That spacing allows the icons to feel collected rather than crowded, despite the variety of shapes and colors involved.
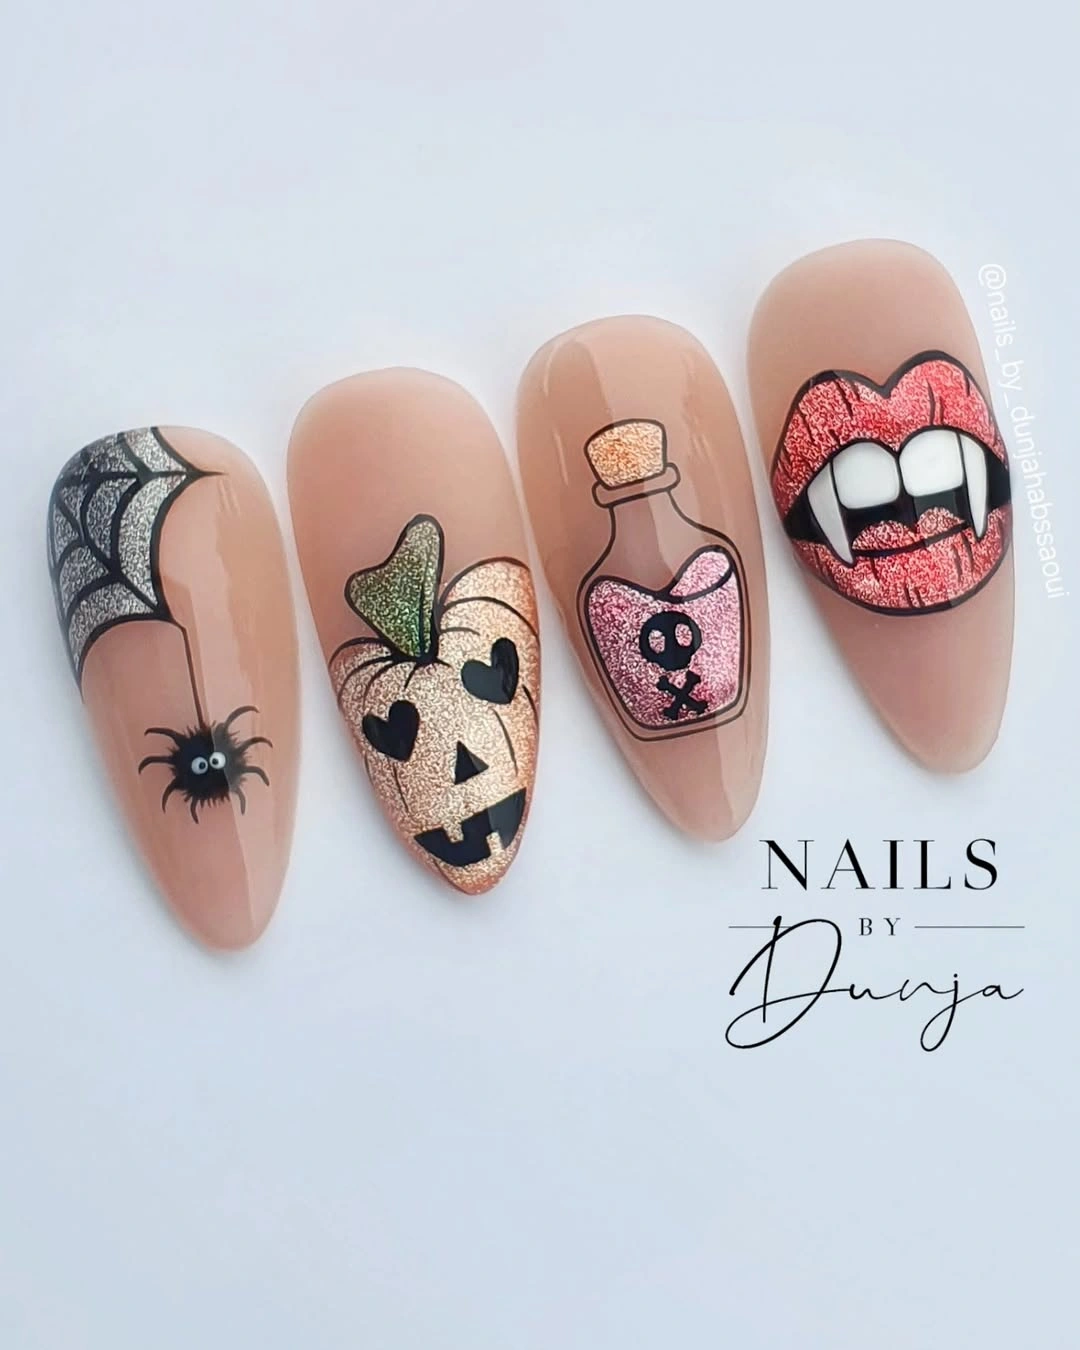
When several illustrated symbols share a manicure, use the nude base as a pause between them. A colorful bottle should not sit beside an equally colorful mouth and eye on every finger. Separate the strongest designs with line-only or nearly bare nails, and let black outlines provide the recurring language. This makes the set feel intentional even though each finger has a different Halloween-inspired subject.
The long almond format gives the drawings enough vertical room, but it also exposes detail density if too much is placed near the tip. Keep the most intricate illustration toward the center and allow a clean border around it. For a shorter adaptation, choose just the spider, potion, and cat eye. Their different silhouettes will still make a complete trio without requiring the full illustrated range.
Black Drips and One Tiny Orange Bow
A black drip edge gives these long square nude nails their dramatic direction, while a white web and small orange pumpkin keep the Halloween references clear. The little bow adds a polished surprise without shifting the palette away from black, white, orange, and nude. The design works because the dripping black acts as a frame, allowing the other motifs to be smaller and more selective.
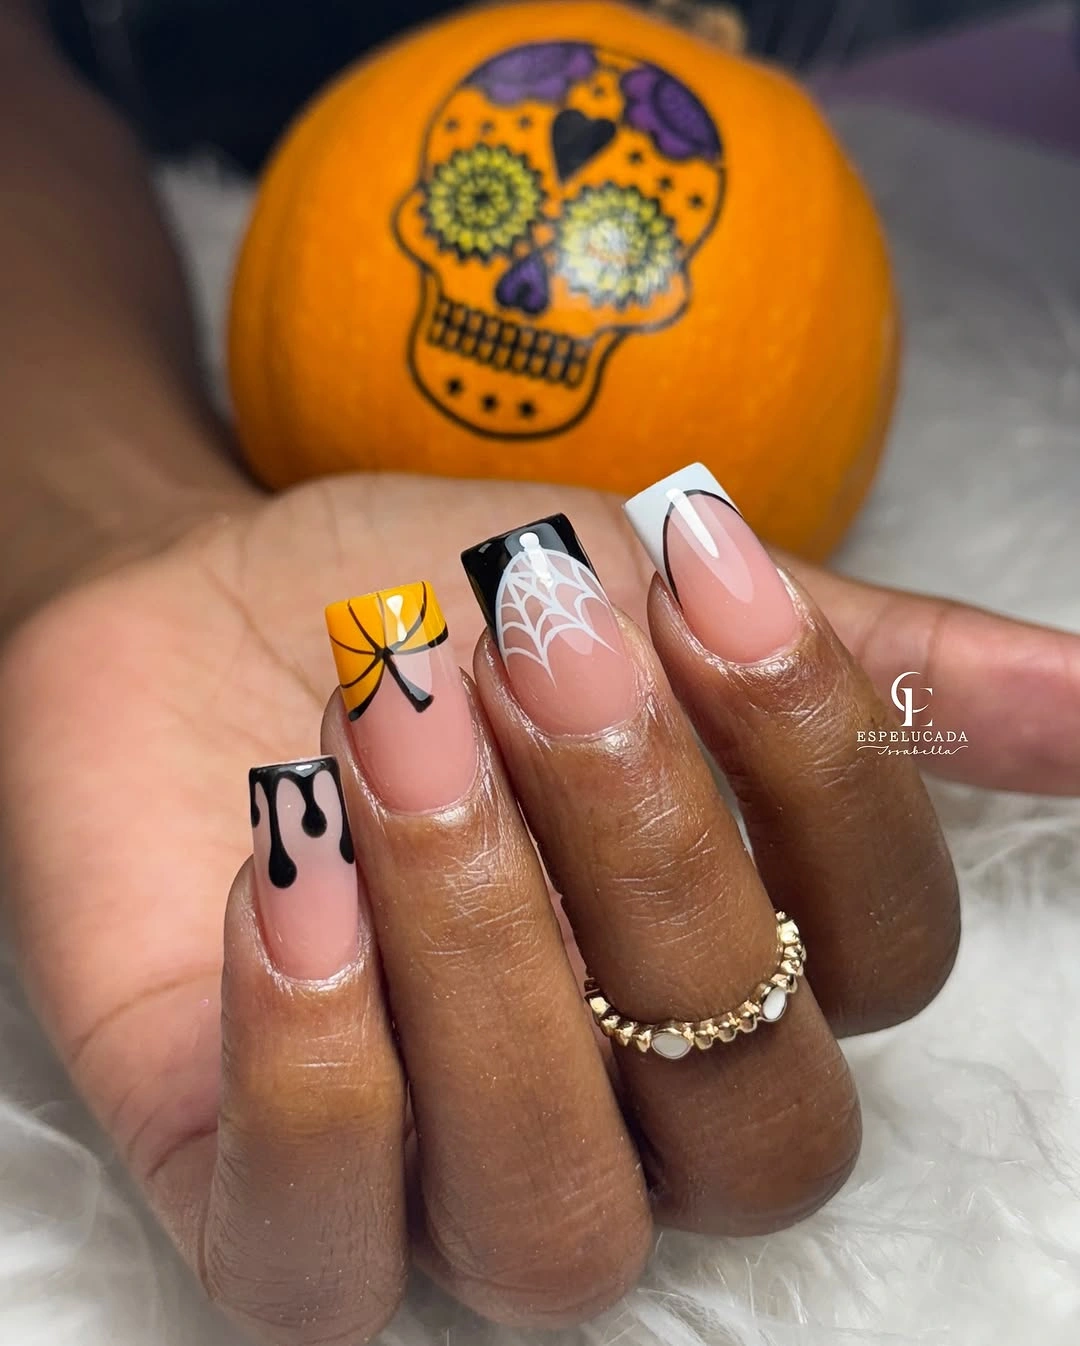
Use the black drip on one or two nails as the heaviest visual element, then repeat a lighter web line or orange shape elsewhere. If every nail carries a dark drip, the manicure can lose the contrast that makes it interesting. The small pumpkin gains more attention when surrounded by nude space. That restraint is also useful if you want black Halloween nail designs pumpkin without a fully dark manicure.
Long square tips make the edge treatment obvious, but they also demand a neat outline because any uneven line is easy to spot. A medium coffin or square shape can carry the same idea with shorter drips and fewer lobes. Keep the bow as one accent rather than a repeated motif. Its small scale works precisely because the black framing remains the dominant feature.
Playful Pink Spiders on Short Oval Nails
Bubblegum pink shifts the mood of these short oval nails, making the black spiders, web arcs, dots, and tiny white face feel playful instead of gloomy. The art is compact and clearly spaced, with the black details used as fine line work rather than as solid blocks. That balance lets the pink base stay dominant, which gives the manicure a lighthearted seasonal personality without abandoning classic Halloween symbols.
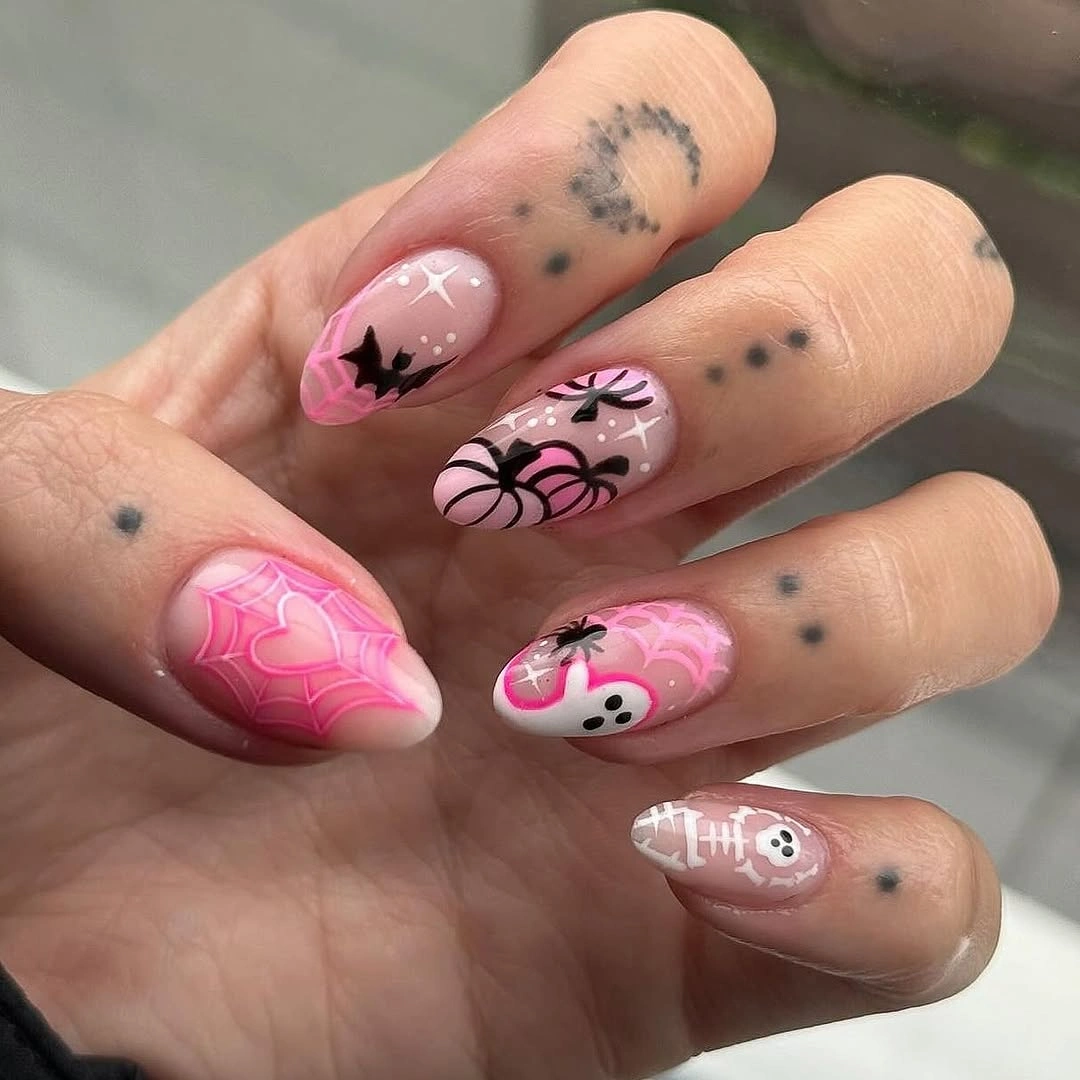
Pink and black work best here when the black lines remain thin. A small spider can sit near the tip, a partial web can occupy a corner, and a dot cluster can fill a gap without covering the entire surface. The white face is effective as a single light accent. Readers who like pink nail designs can keep the pink as the main color rather than letting the spiders take over.
Short oval nails are practical for a detail-led design because the rounded shape softens the web and spider forms. The limitation is space, so choose one motif per nail rather than layering a spider, ghost, and pumpkin together. Those who want more seasonal color can add one orange dot or tiny pumpkin, but the pink base should remain the clear visual decision.
Graphic Skull Faces With a Small Orange Accent
Black-and-white skull-like faces, web lines, and graphic character shapes sit on a warm nude background, with orange used sparingly as a seasonal accent. The medium almond shape softens the strong outlines and gives the illustrated faces enough room to read. Because several nails remain mostly nude, the dark artwork feels crisp and focused rather than like an all-over cartoon print.
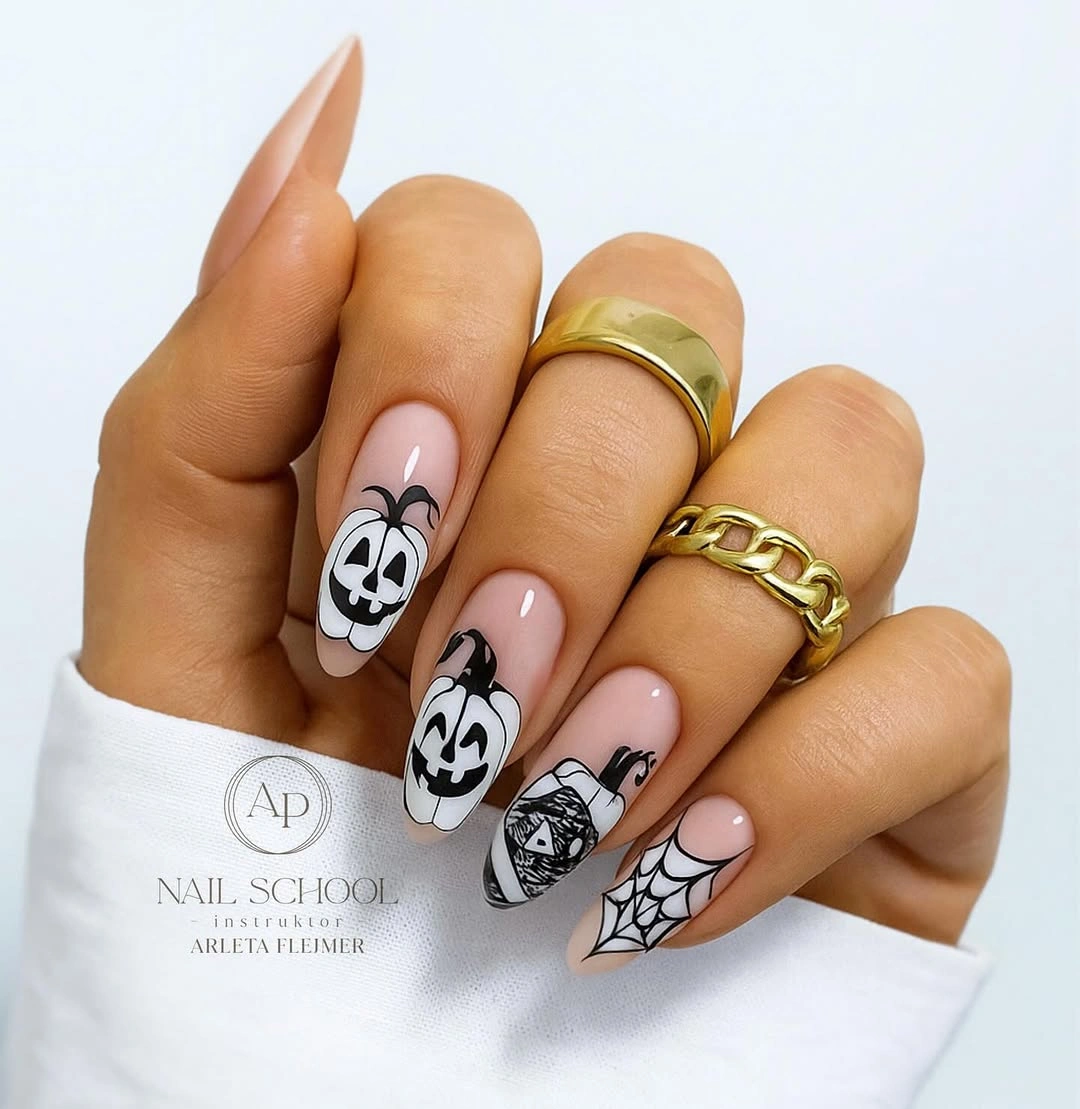
A small orange detail is enough to turn a black-and-white manicure toward Halloween. Place it beside one face or use it for a tiny pumpkin-like shape, then let the other nails rely on graphic outline work. This restraint makes the character art easier to notice. It also means the design can pair with many outfits without the orange becoming the only visual thing people see.
Medium almond nails are a good middle ground for illustrated looks because they provide space without feeling overly long. If you shorten the set, keep the skull face and one web, then leave the rest plain nude. That edit maintains the contrast and theme while reducing the chance that the details blur together. A quiet nail is often what makes a busy nail look intentional, as in other almond nail shapes.
Botanical Vines Around Sheer Orange Pumpkins
Fine green vines give these sheer nude almond nails a botanical Halloween mood, wrapping around orange pumpkins and small berry-like dots. The line work is delicate, with the longest nail surface used for the most extended vine. Rather than relying on thick black outlines, the manicure creates its seasonal feeling through warm orange, soft green, and carefully placed tiny marks that resemble a garden detail.
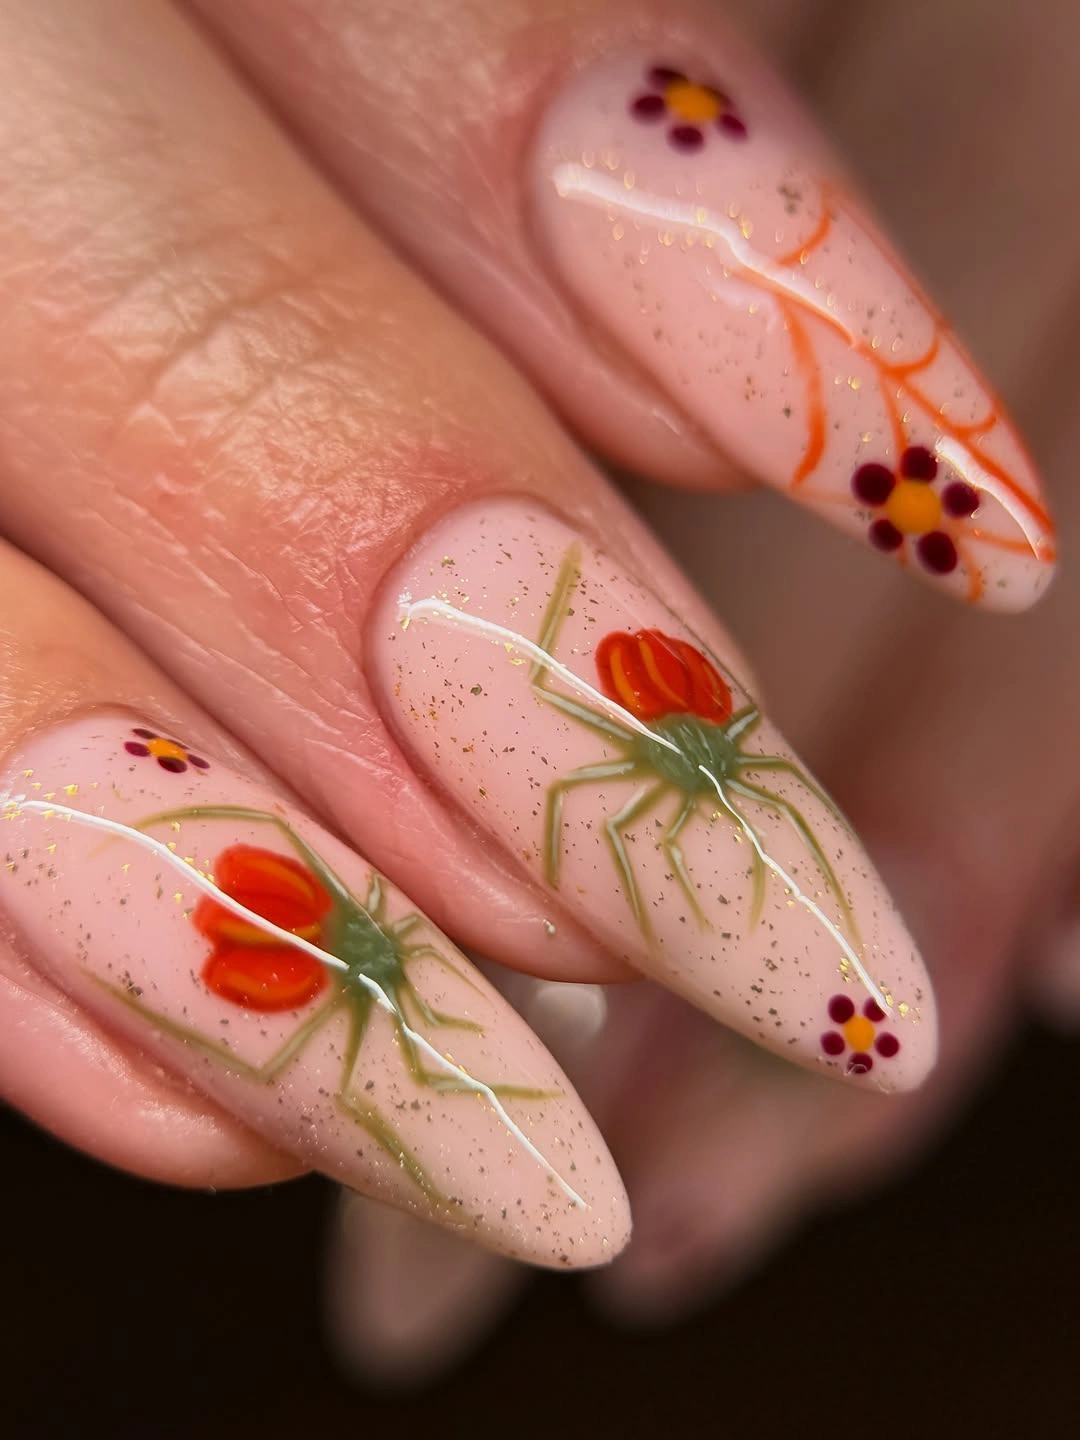
Vines are a useful way to connect pumpkin art across several nails without repeating the same face on every finger. Let one line trail over a longer nail, then reduce it to a leaf or dot on a neighboring one. The orange pumpkins can remain small because the green placement gives them context. This is a gentle alternative to the usual black-and-orange Halloween color block.
Fine lines have a maintenance consideration: they need enough contrast to stay visible without becoming thick. On a shorter shape, use a single pumpkin with two leaves instead of a long vine. The sheer base will still keep the design airy and let the orange stand out. Avoid adding too many berry dots, since the open background is part of what makes the botanical effect successful.
Black Bow Beside Pumpkin and Web Art
A glossy black bow becomes the focal point in this medium coffin manicure, balanced by nude space, a small orange pumpkin, a web, and a red-orange detail. The bow introduces a polished shape that is different from the more organic curves of the pumpkin and web. That contrast gives the set a dressed-up quality, while the limited black placement keeps the overall design from becoming too heavy.
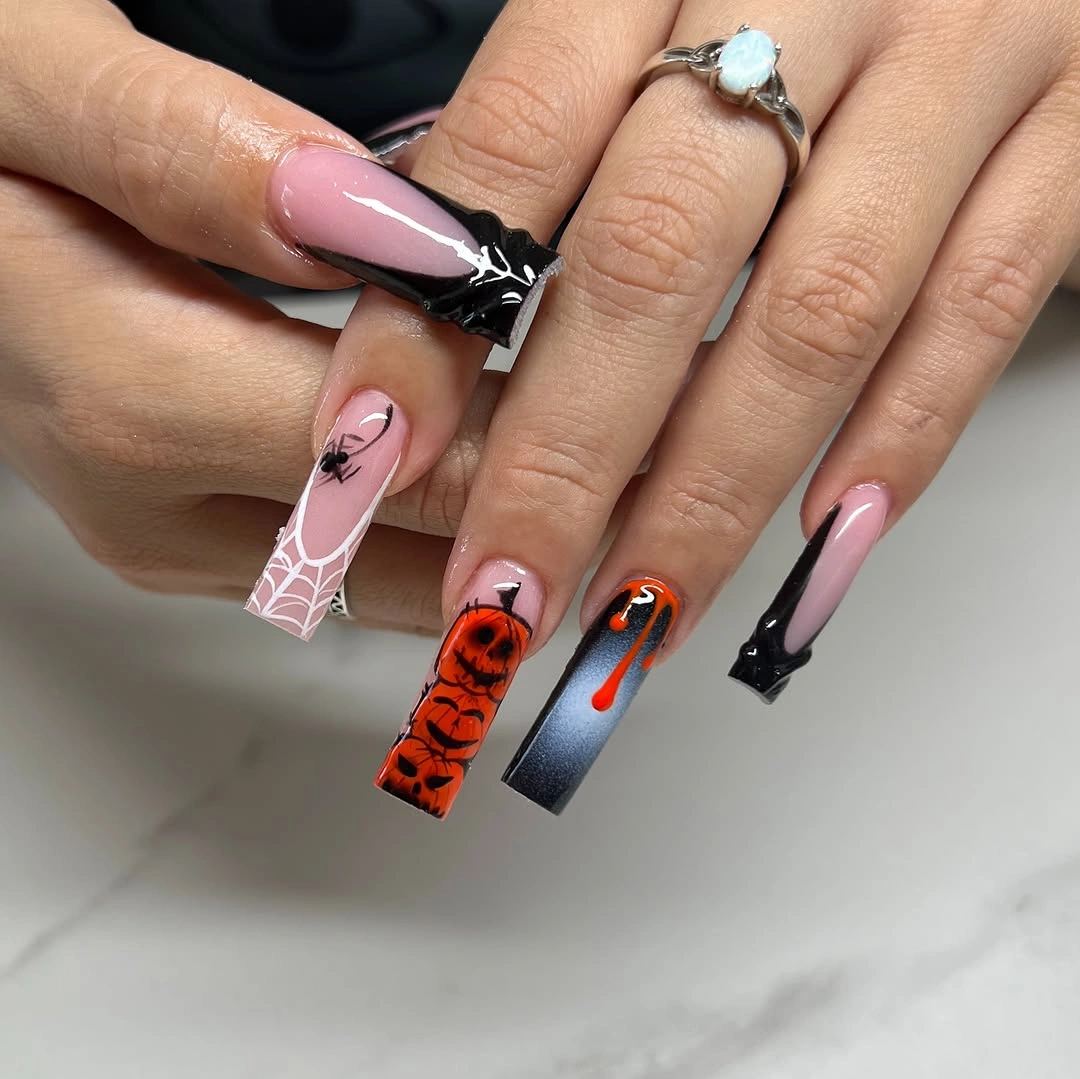
Mixed motifs are easier to coordinate when one graphic element takes the lead. Here, the black bow can occupy the most visible nail, while the web and pumpkin function as supporting notes. Repeat black only on a few fingers to preserve the nude base. The red-orange accent works best as a small streak or curve, giving the pumpkin color an echo without creating a second focal point.
Coffin shapes provide a straight enough tip for bold art, but a medium length is more practical than a very long version for daily tasks. If you want to simplify, keep the bow and pumpkin, then replace the web with a single black line. The manicure will retain its strongest contrast and remain distinctly Halloween-themed without needing four separate illustrations per hand.
Pink Negative Space for Maximal Spooky Art
Pink negative space keeps this long pointed manicure from feeling too dark, even with black webs, orange pumpkins, white ghosts, and graphic outlines spread across the nails. The pink behaves like a bright background rather than a decoration, giving every black line a clear edge. Long pointed tips amplify the dramatic motifs, but the open pink areas keep the set playful instead of turning it into a solid black seasonal look.
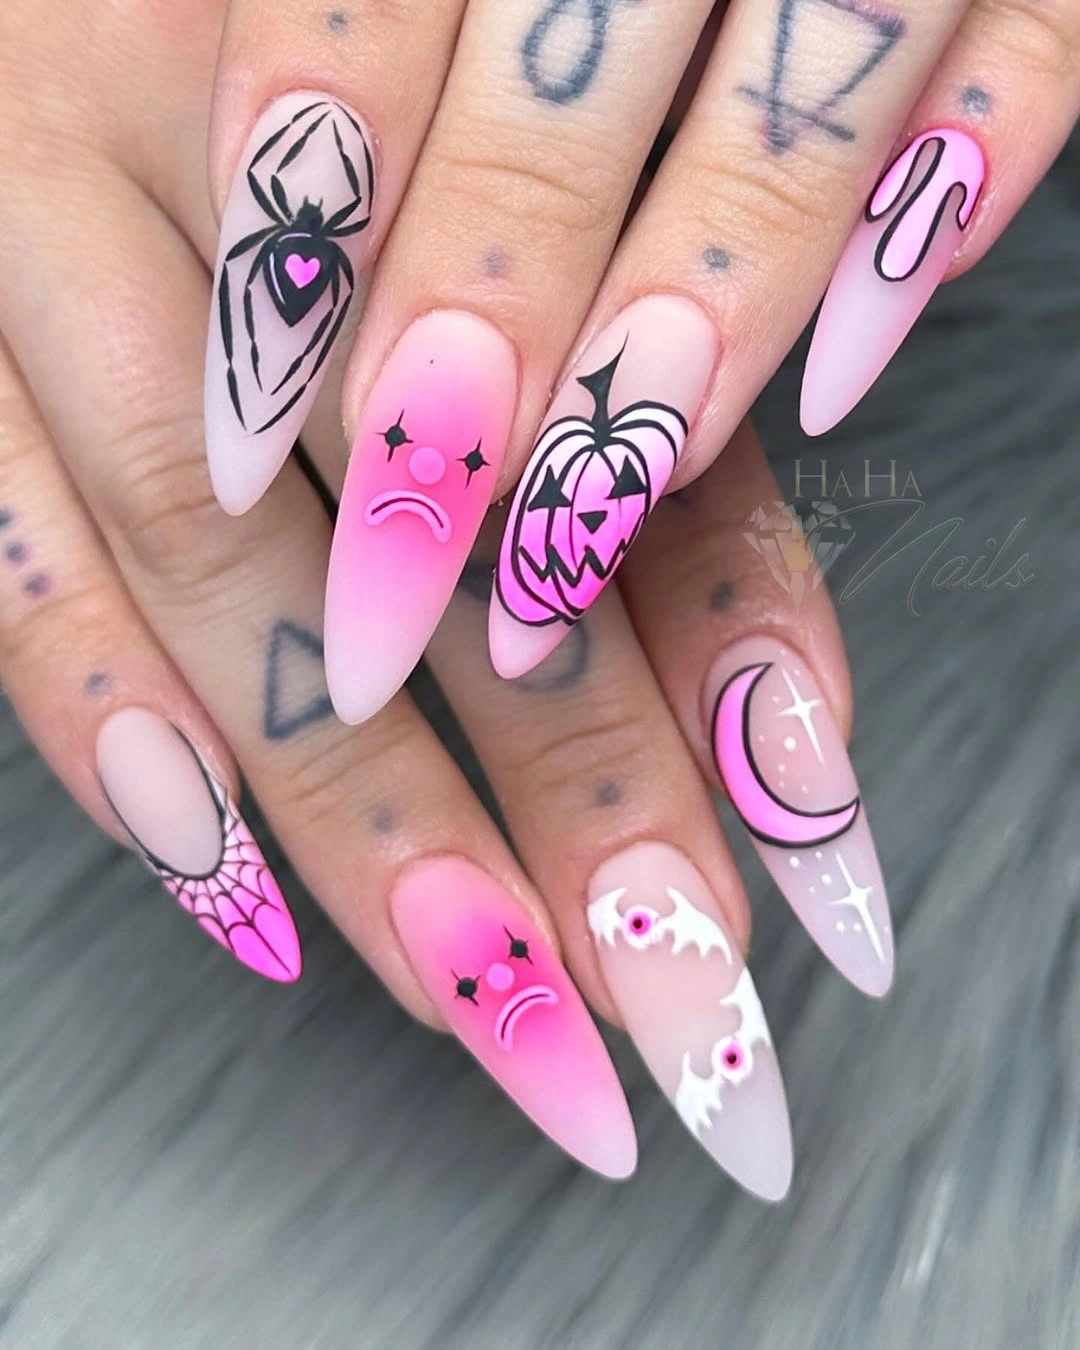
When a nail set includes several bold icons, rotate full motifs with line-only nails. A web can be reduced to two or three arcs, while the pumpkin or ghost gets one complete surface. That variation makes the pink base visible as part of the design. It also prevents the longest nails from feeling visually heavier than the shorter fingers once the hands are viewed together.
The pointed shape makes the art dramatic, but its length can be less convenient for typing or frequent hands-on tasks. A medium almond version could preserve the pink-and-black contrast with only a pumpkin, ghost, and corner web. Focus on the negative space first. The specific number of icons matters less than keeping the bright pink field open around the black outlines.
Candy-Corn Points With Bold Pumpkin Details
Orange points, candy-corn bands, a pumpkin, and black lettering make this long manicure the loudest seasonal statement in the set. Yellow, white, and orange appear in firm graphic sections, while black outlines prevent the bright colors from blending together. The nude nails provide a necessary pause between those high-energy fingers, giving the lettering and pumpkin enough contrast to stay readable instead of becoming part of a continuous orange field.
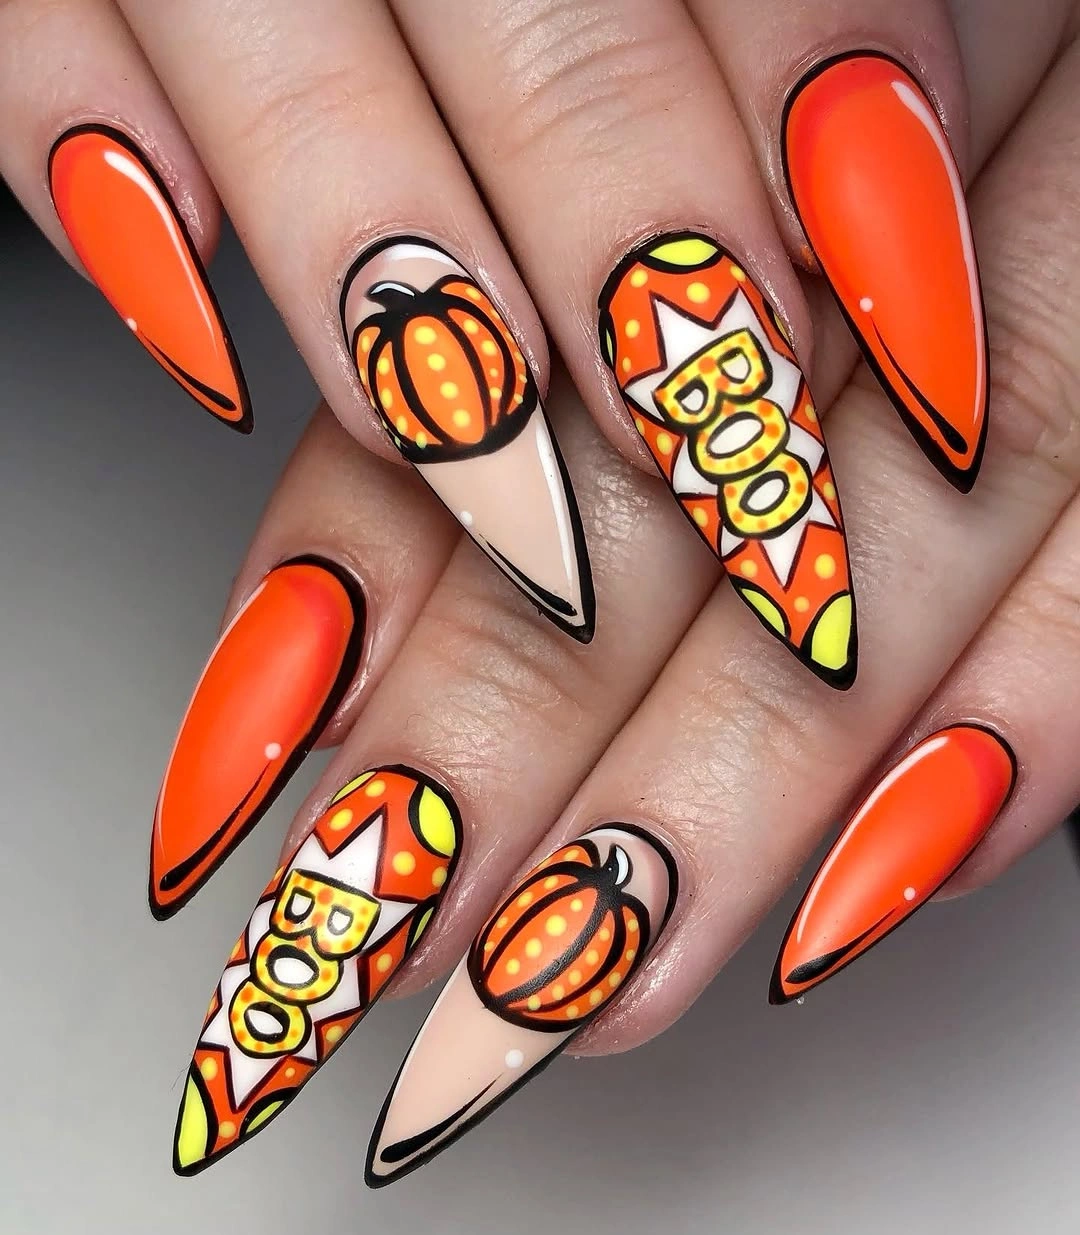
Candy-corn color blocking works best when it is concentrated on one or two nails rather than used as a full-hand pattern. Let a pumpkin occupy another finger, then use a plain orange point or a nude nail to break the sequence. The black word art should stay on a single focal nail. That layout gives every feature a purpose and keeps the cheerful colors from competing.
Bright orange tips are highly visible when they chip, so a sheer or nude companion nail is useful for balancing the maintenance side of the design. You can shorten the look by keeping one candy-corn stripe and one small pumpkin on medium almond nails. The dramatic color story will still read immediately. The long point is exciting, but it is not the only part carrying the Halloween message.
Scrapbook-Style Pink Miniatures and Red Speckles
Soft pink rounded nails become a miniature Halloween canvas through red speckles, a tiny pumpkin, and small framed illustrations. The details are intentionally small, with broad pink space around each one, which keeps the short length from looking overfilled. Gold-toned touches add a little warmth, but the pink background remains the main visual decision and gives the seasonal motifs a gentler, more personal mood.
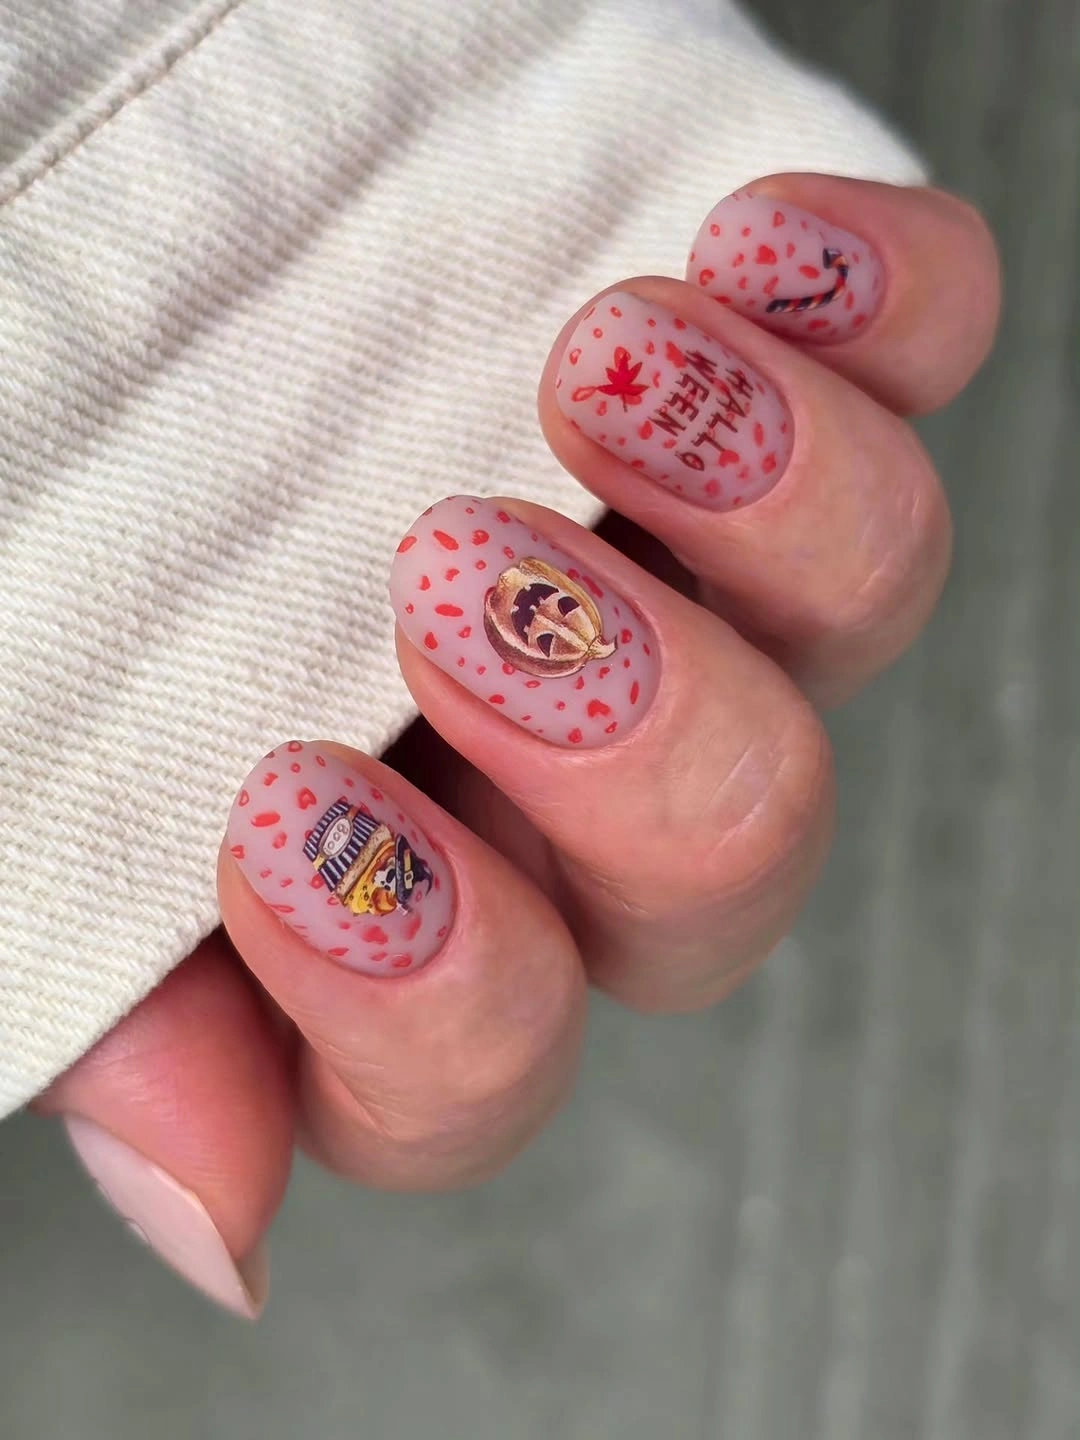
Think of this layout as small keepsakes placed on a clean page. Each nail can hold one framed icon or a cluster of red flecks, while another stays mostly pink with only a subtle mark. That uneven distribution creates rhythm and lets the tiny illustrations be discovered gradually. A pumpkin does not need to be large to feel seasonal when the surrounding colors already suggest October.
Very small art needs protection from crowding, especially on rounded tips. Keep the speckles away from the framed motif so the outline does not disappear into the background. If you prefer a simpler short set, use the pink base and red flecks on most nails, then save one miniature pumpkin for an accent finger. The result will still have charm without demanding close inspection to understand it.
Pearly French Edges With Airy Spider Art
Pearly nude tips give these medium almond nails a light, almost luminous edge, while black spiders, fine web lines, and one tiny ghost bring in the Halloween references. The contrast is delicate because the black details are narrow and the pale French effect remains visible around them. Rather than turning the whole nail dark, the design lets seasonal art float over a soft reflective background with plenty of open space.
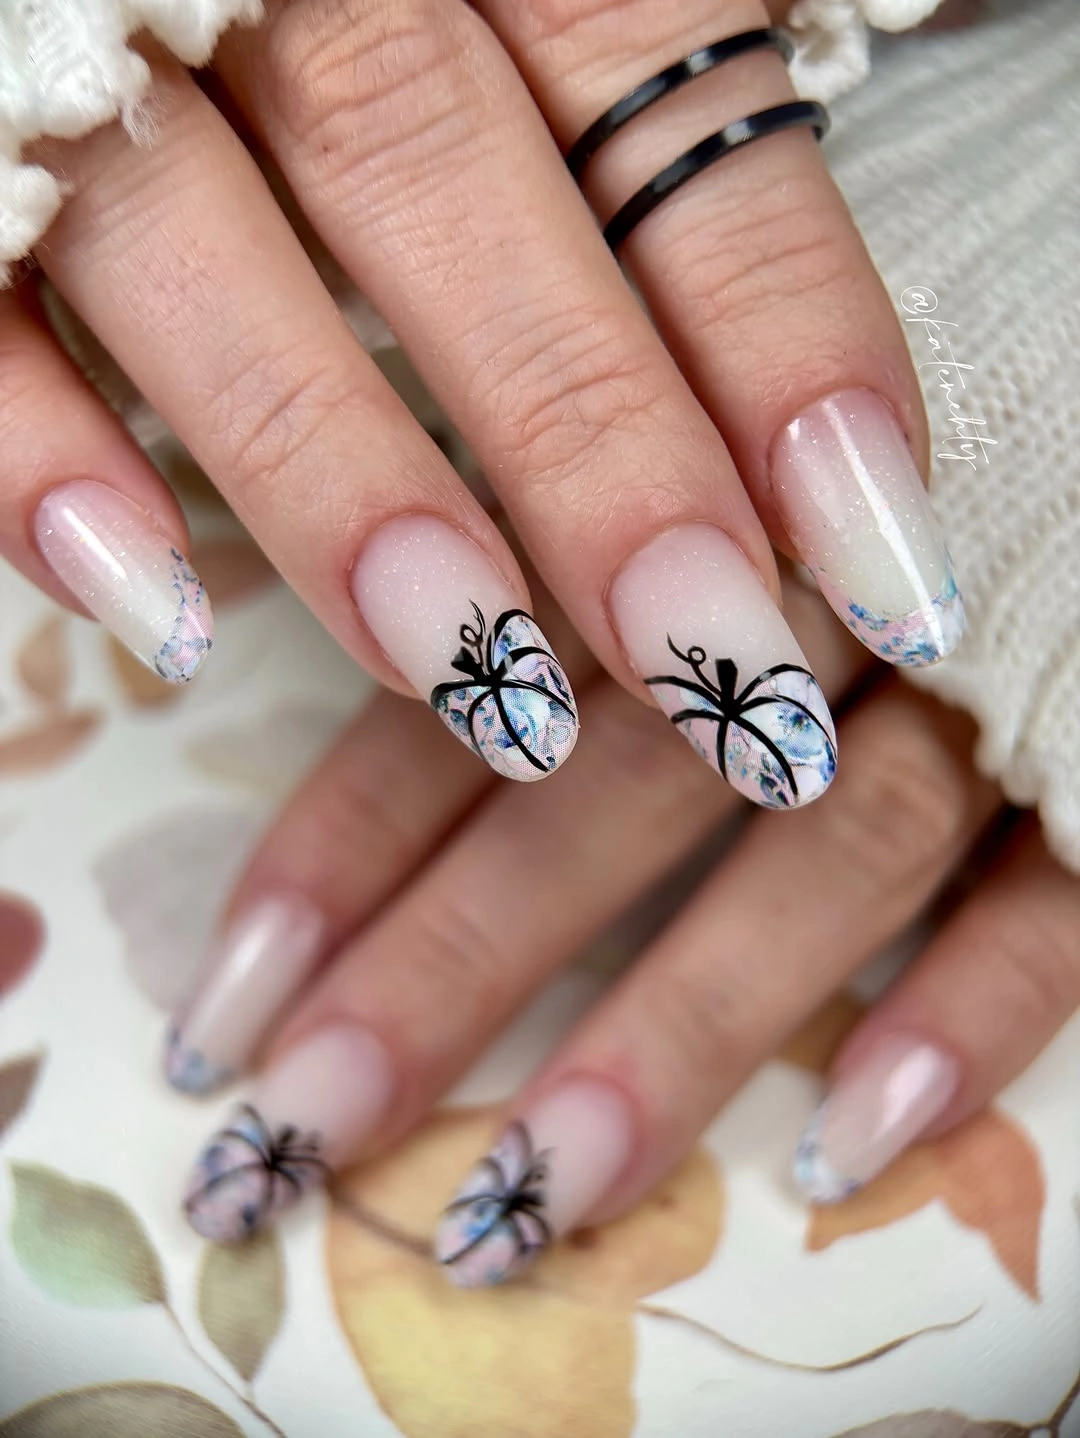
A fine web can feel more refined than a full dark spiderweb when it occupies just one corner of a pale tip. Pair it with one small spider and a single ghost, then leave the rest of the fingers focused on the pearly edge. This approach makes the manicure easier to wear beyond Halloween events. The season is present, but the pale finish still leads the visual conversation.
The pearly surface may show how densely a line is placed, so keep the black art clean and avoid adding several heavy motifs beside it. A small orange accent is optional, not necessary. For an understated version on shorter almond nails, use only a spider and corner web over the pale edge. The airy contrast will continue to feel more distinctive than a crowded set of icons.
Mauve and Glitter for Classic Halloween Icons
Mauve accents and a silver-glitter drip refresh this long rounded-square manicure, which also includes a ghost, witch hat, pumpkin, and web. The deepest black nail carries the glitter detail, giving the set one dramatic anchor, while nude and mauve nails keep the surrounding icons softer. That contrast makes the familiar Halloween motifs feel more dressed up, with color variation doing more work than sheer quantity of artwork.
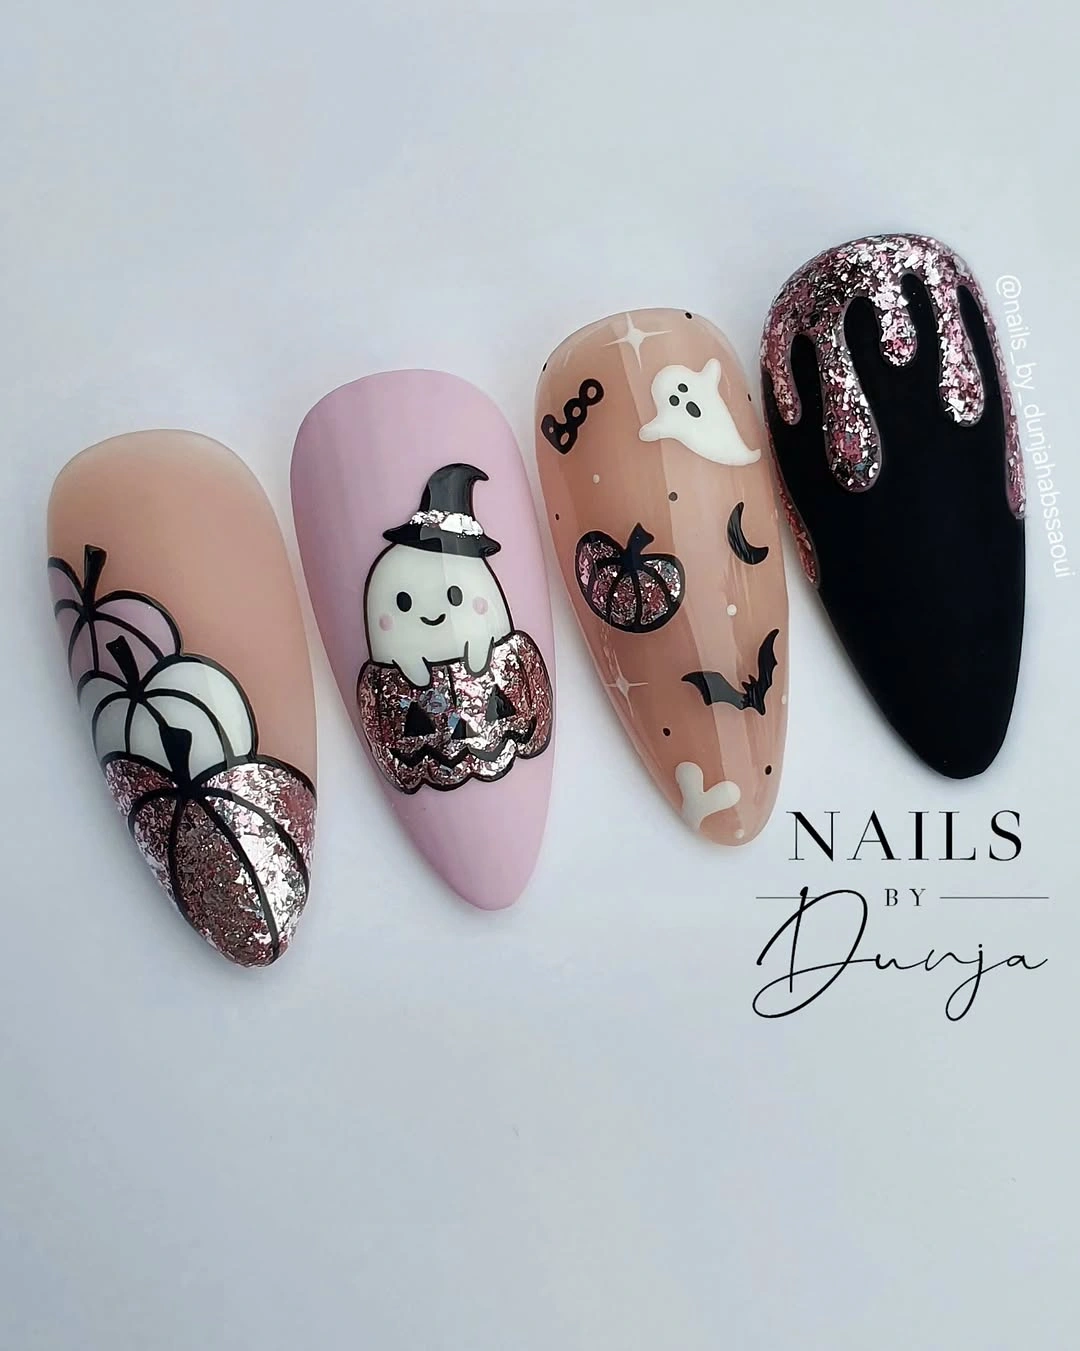
Use the full black nail as a single punctuation mark, then spread the ghost, pumpkin, and web across lighter bases. Mauve is especially helpful because it bridges nude and black without introducing another bright seasonal color. The silver drip should stay on the dark nail where it can be seen clearly. Moving glitter onto every finger would weaken the careful contrast between the finishes.
Long rounded-square nails give this design room for multiple icons, but a shorter version can still work with mauve, one ghost, and a black glitter accent. The real decision to keep is the finish contrast: soft glossy color beside one dense sparkling detail. That balance gives the manicure a Halloween mood while leaving enough calm space for the individual motifs to remain easy to read.